Getting Started
Now that you have SmarterMail installed, it's time to get things set up. Below is a quick walkthrough that shows you how to add a new domain, how to add a new account to that domain, then how to send a test message between users. After that, there are some helpful links to additional help topics for things like adding new domains and users, configuring antispam, DNS configuration, and more.
Free Installation Available!
If you're not quite to the point of getting SmarterMail installed, that's okay: SmarterTools offers complimentary installation of any new license purchase! You should have seen that as an option when you placed your order but if not, just email us at sales@smartertools.com and we can help get you scheduled. In addition, SmarterTools offers paid training to help get you on your way to expert mail server management.
A Quick Walkthrough
With SmarterMail installed, it's time to set up a domain and send your first email. NOTE: Until you have DNS set up, any mail sent from SmarterMail will be sent locally. (I.e., You can only email yourself -- nothing is sent or received from outside the SmarterMail server.)
Adding Your First Domain
- Log in to SmarterMail using your system administrator username and password.
- Make sure you're on the Manage tab. (This tab generally opens by default.)
- In the left tree menu, select Domains.
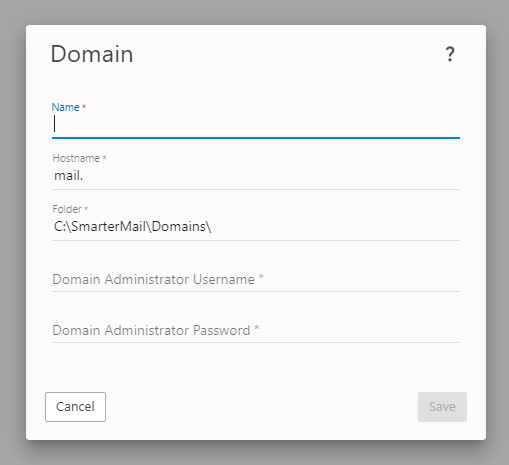
- As we're adding a new domain, you'll want to use the New button in the content pane. the Domain modal opens:
- Fill out the information on the Domain modal:
- Name - This is the domain name, plus extension, you want to add to SmarterMail. For our purposes, we "used example.com".
- Hostname - This will be set up automatically using "mail." as the domain prefix for your SmarterMail webmail login URL. Using "example.com", our hostname is "mail.example.com" and the webmail login would become "http://mail.example.com". This can be edited as needed, but it's recommended that you leave this as the default.
- Folder - This, too, is set up automatically using the default path for the domain folder. Again, this can be changed as needed, but it's recommended that you leave this as the default.
- Domain Administrator Username - As a system administrator, you need to add a primary domain administrator for each domain you set up in SmarterMail. If you're also going to be a user of the domain, you can use your own account as the primary domain administrator and use SmarterMail just as everyone else does, you'll just have some additional Settings that others won't. (Name, you'll have access to Domain Reports and Domain Settings.) If this is one of many domains you're adding, you can use a generic username such as "domainadmin" or, for the sake of brevity, "dadmin".
- Domain Administrator Password - This is, of course, the password to use for the username created above.
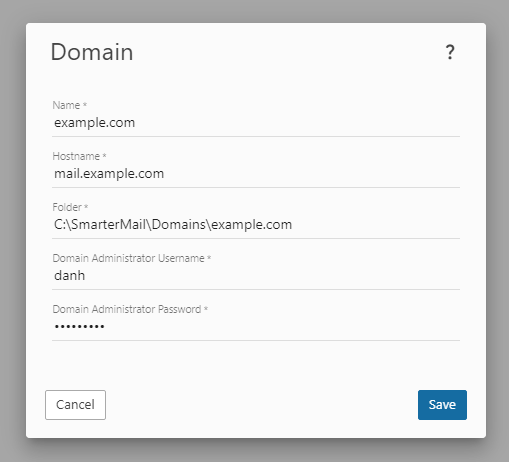
- Your filled out modal will look something like this:
- Once you're happy with it, be sure to Save the changes you've made in the modal.
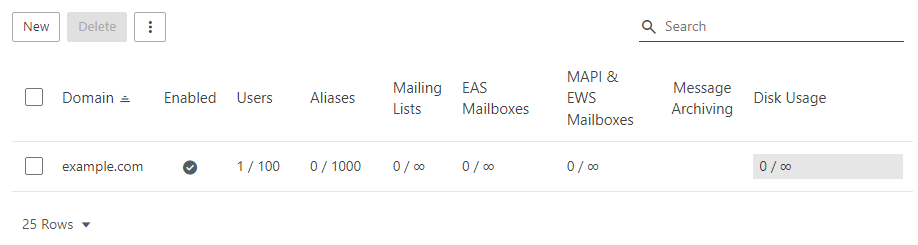
Congratulations! You've added your first domain in SmarterMail. Your Domains page should now show something like this:
Logging In To Your First Domain
Now that you've added your domain, you can log into it as the domain administrator. As your DNS may or may not be set up yet, the easiest way to login as the domain administrator for the new domain is this:
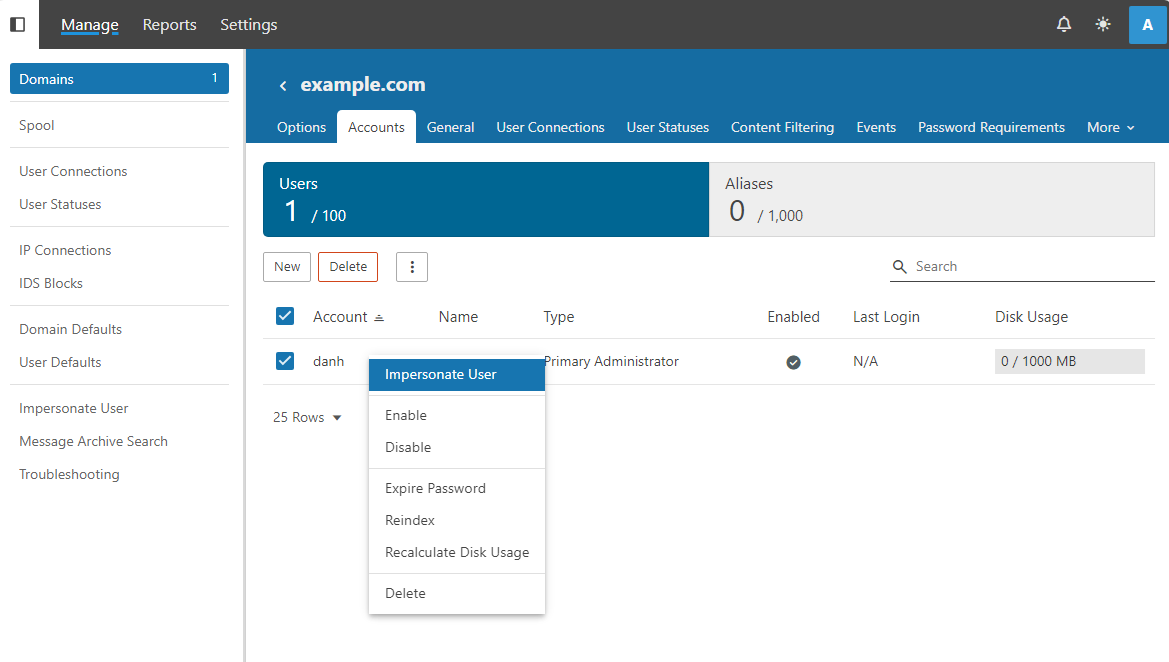
- Staying on the Domains area, select the domain you just added to open its details.
- Using the Accounts tab, right-click the domain administrator account you just created and select Impersonate User from the menu. This will log you in as that user on the domain you just added to SmarterMail.
- You will initially be logged in to that domain administrator's account settings. However, what we'll do next requires you to be in that domain's settings, not the domain administrator's settings. So:
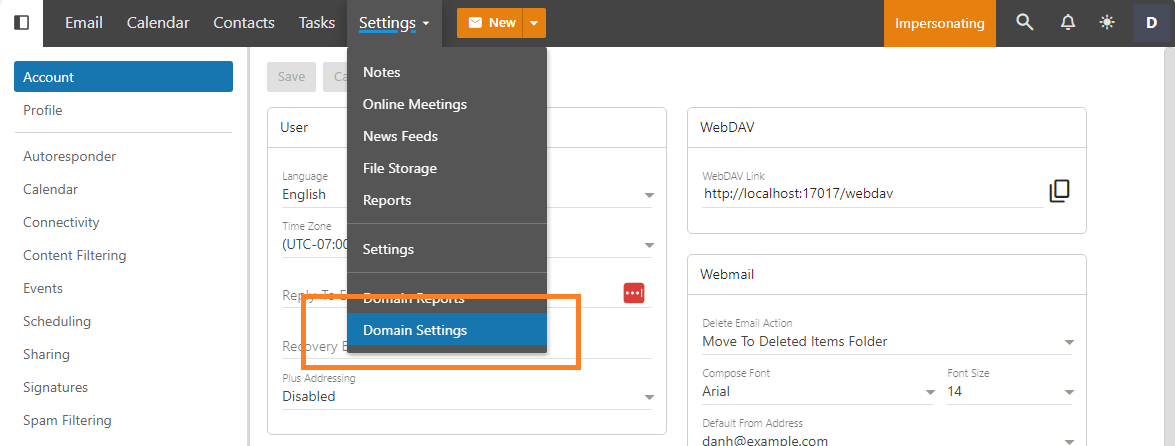
- Use the Settings menu at the top of the page and select Domain Settings from the dropdown.
- Once selected, the Accounts page will be opened, and you'll see the domain administrator account listed on the Accounts tab. From here, we'll add a new account, then send a test email.
Adding a New User to Your Domain
Since we're already on the Accounts tab in the domain's settings, adding a new account isn't much different than adding in the domain administrator account you set up. You just need to do the following:
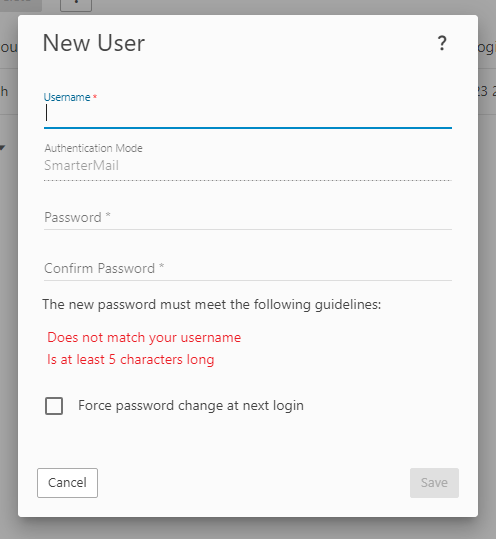
- Use the New button to open the New User modal.
- As you can see, the information necessary is not much different than what was used to set up the initial domain administrator account. For now, you just need to add the following:
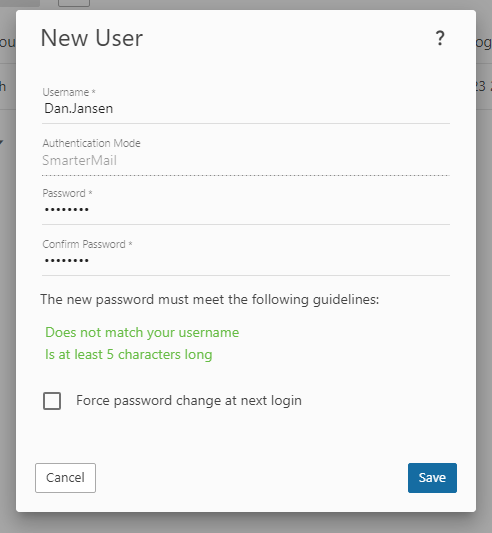
- Username - This is what forms the email address for the user you're adding. So, if "Dave Jansen" is the user you're adding, their username may be something like "djansen" or "Dan.Jansen".
- Authentication Mode - For now, you'll be using a standard password for the user, which is why, by default, you'll see "SmarterMail" listed here. That simply means that SmarterMail is responsible for the authentication of the user. In the future, you can change this to something like Active Directory or, if you're really ambitions, you can use a login External Provider. (But that's a bit more advanced and beyond what we're covering here.)
- Password / Confirm Password - Yeah, this is pretty much what you think it is. The difference here, though is that there are some basic, default password requirements you'll need to follow. These are listed in red on the modal. System administrators can set default password requirements for all users on the server, then domain administrators can add on to those requirements if they so desire. Again, that's a bit advanced for right now, but you can read more on that once you get into SmarterMail a bit deeper.
- Force password change at next login - You can check this box if you want the user you're creating to change their password when they initially log in to the SmarterMail web client.
- Once you're satisfied with the user information, be sure to Save your changes.
- When you do, you'll be taken to the new user's Account settings. Here, you can modify their account as needed, or you can let them edit their own settings when they initially log in to the SmarterMail web client.
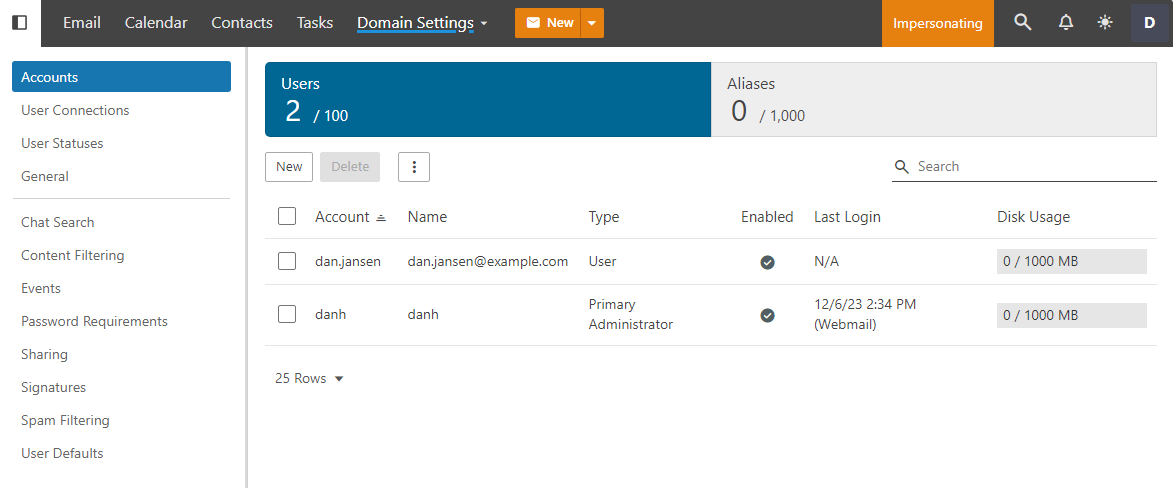
- However, if you select Accounts from the tree menu, you'll see both accounts you've created listed on the Users tab.
- Now, let's complete our final Getting Started task:
Sending a Test Email From One User to Another
Now that we have 2 new users set up -- the domain administrator and another user -- let's try sending a test message from one to the other. As mentioned earlier, since DNS may not be set up yet, sending this message will stay local to the domain, meaning it won't travel outside of the SmarterMail server. However, this will also get you familiar with the SmarterMail web client.
To send a test email, do the following:
- As you're already impersonating the domain administrator account you created, simply select Email from the top menu. This will take you to the Email section of SmarterMail.
- By default, you'll arrive at your Inbox. Chances are there's nothing in there, but there will be soon.
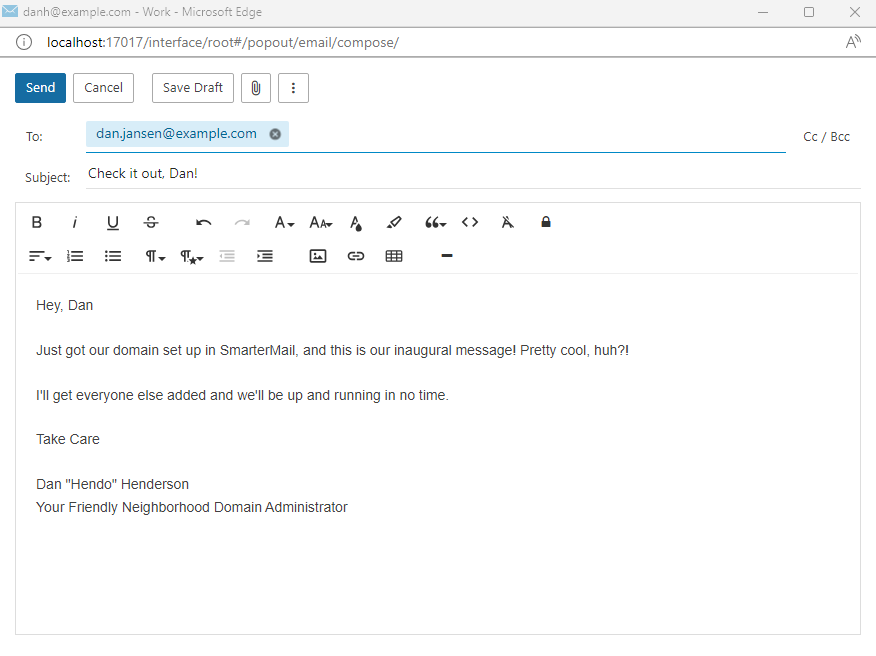
- To create a new message, use the orange New button. This will open SmarterMail's email compose window. This should look very familiar as it's just what the name implies: a way to compose a new message that can be sent to anyone you choose.
- Start typing the username of the new user you just created in the To: field. You should notice that SmarterMail already anticipates who the recipient of the message is using its autocomplete functionality. You can select the suggested name or simply keep typing out the address.
- Next, fill out the Subject of the message, then start typing in the message area.
- Once you're satisfied with your message, use the Send button to send it on its way.
- After the message is sent, you can impersonate the new account, just as you did when you impersonated the domain administrator account.
- Briefly, you go to the Accounts tab for the domain, right-click on the username of the account you want to impersonate, and select Impersonate User from the menu. This will open up that user's mailbox in a new tab.
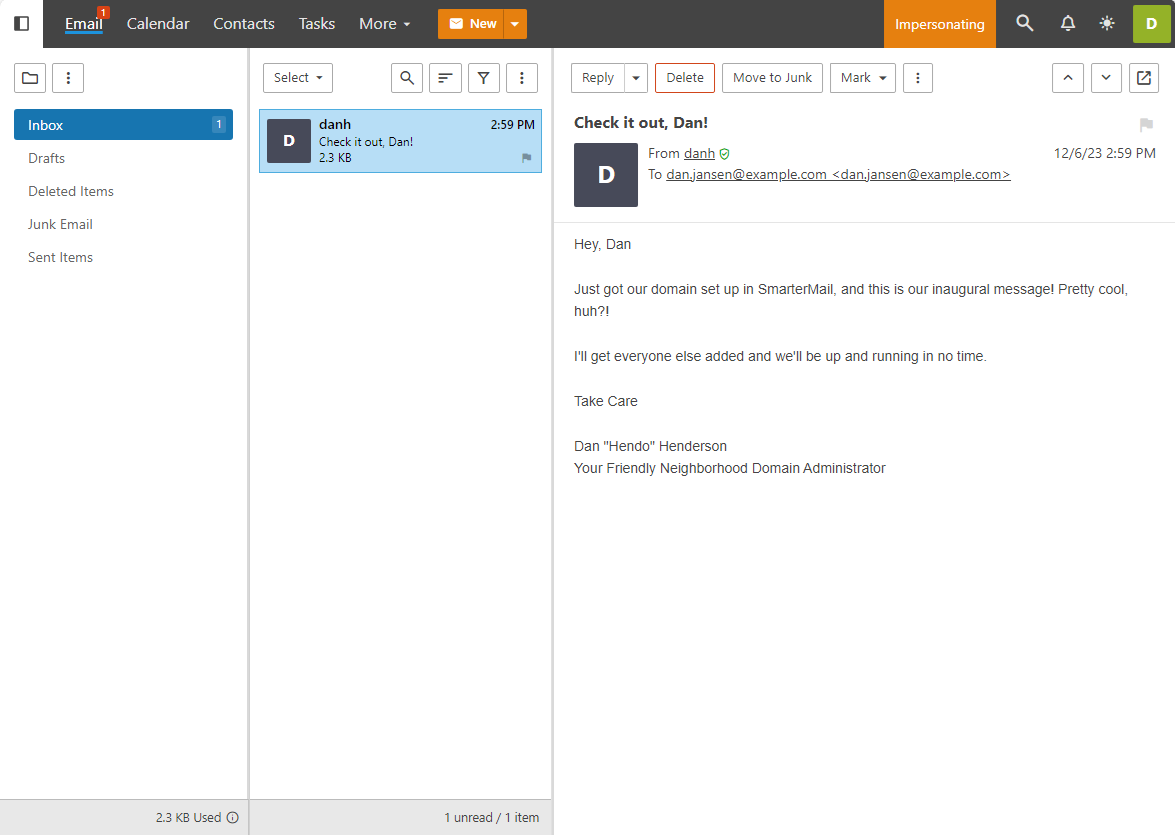
- Hopefully you notice a few things:
- There's a red 1 on that user's Email menu. That denotes there's 1 unread message. (The one you just sent!)
- When selecting Email from the menu, you'll see that user's Inbox. It, too, will show a 1 to the right of its name in the tree menu.
- You'll see the message you sent in that user's Inbox. It should be selected by default and its contents show in the content pane.
- That's it! You've successfully sent and received your first email.
Of course, this is just the tip of the iceberg! There is much more you can do with SmarterMail, but this at least gets you started. Take a look at the additional help topics listed below and start your journey towards successful SmarterMail server administration.
Additional Helpful Links
Adding New Domains
As a system administrator, it's easy to add new domains, whether using custom configurations or default settings for every domain you add.
Adding New Users
As a domain administrator, adding users is quick and easy, whether using custom configurations or default settings for every user you add.
Configuring Antispam
SmarterMail offers a number of antispam options, free of charge, right out of the box. Setting them up helps protect your users and your server.
General Security Settings
After Antispam, configuring user password requirements, system events and some other important security features is a great next step to securing your server.
- Password Requirements
- System Events
- IDS Rules
- There are additional precautions you can take as well.
DNS Configuration for a Mail Server
Before a mail server is ready to be put in service, some DNS configuration is necessary for the domain(s) on the server so that mail can be sent and received.
Sending Your First Email
Once everything is set up, it's time to test things by sending your first email.
Ports
A mail server also requires specific ports to be opened to the outside world. Therefore, if you have a firewall sitting in front of your network, or your mail server, you'll want to open the following ports:
- 25 - Commonly used for SMTP traffic.
- 53 - DNS Resolution. NOTE: Port 53 is used for DNS only. If DNS is not run on the SmarterMail server, this port does not need to be open.
- 80 - Used to access SmarterMail's web client. Also used by EAS.
- 110 - Used for POP connections made to the server.
- 143 - Used for IMAP connections made to the server.
- 389 - Used for LDAP connections to the server.
- 443 - Used to access SmarterMail's web client over SSL. Also used by EAS.
- 465 - SSL/TLS SMTP Port.
- 587 - Submission Port - Commonly used as an alternative port number for SMTP traffic (supports SSL/TLS).
- 993 - SSL/TLS IMAP Port.
- 995 - SSL/TLS POP Port.
- 50099 - Used for XMPP (live chat) connections.