Brands
A brand is the top level of the SmarterTrack help desk. For smaller companies, the brand is just another name for the company itself so there may only be one brand in SmarterTrack. However, companies with different divisions may want to use SmarterTrack to manage all company communications, separately, for all divisions. In addition, some companies have different brands that specialize in specific products and/or clientele. SmarterTrack can accommodate all of these scenarios, and many more, by allowing companies to set up separate brands without having to install multiple different instances of SmarterTrack.
The TRUE benefit of Brands, however, is in employee management. Utilizing a multi-brand configuration in SmarterTrack allows a company or business to support all of their brands using a single agent base. That means that a single agent can handle sales or support (or billing...or customer service...) requests from multiple brands at the same time. This allows a company to maximize their coverage while minimizing the need to hire agents specifically for one brand. Agents can work with customers in each brand separately, and customers of each brand have access to customized and brand-specific web portals.
Features that support branding include tickets, live chats, knowledge base articles, news items and the portal interface, as well as department and group creation. That means that each brand can have its own set of departments and groups, and agents can be attached those brand-specific departments and groups, or to departments and groups across multiple brands.
To access the Brands section, log into the management interface with an administrator account. Then select Settings from the Navigator. Next, click on Brands in the navigation pane. Any brands associated to your SmarterTrack installation will load in the content pane.
To add a new brand, click New in the content pane toolbar. A modal window will display fields for the Brand Name and Host Header(s). Once saved, the additional brand settings will appear in the content pane. To view the settings for a specific brand, simply double-click the brand or select the brand and use the Edit button. The brand settings will load in the content pane and the following tabs will be available:
Jump to:
- Options
- Permissions
- Portal
- Cookie Disclaimer (If enabled on the Options tab.)
- Custom Links
- Autoresponders
- Business Hours
- Holidays
- Custom Messages
- Community Categories
- Customizing Survey Appearance
Options
Use this tab to edit the following settings:
- Brand Name - The name of the brand. This can be a company name, a product name, a division of the company, etc.
- Host Headers - Host headers allow a web server to host more than one website domain over a single IP
address. In SmarterTrack, the host header will be used to identify which brand is displayed in the portal. For
those using self-installed SmarterTrack, you will want to make sure your SmarterTrack domain in IIS has the
proper bindings set up for the various host headers you want to use in addition to adding them for each Brand in
SmarterTrack. For those using the hosted SmarterTrack helpdesk, please see Point Your Own Domain Name at your Hosted SmarterTrack Helpdesk.
note: Host headers cannot be edited after the brand is created.
- Company Website - The URL to the primary website for the brand.
- Enable Cookie Disclaimer - Enabling this will activate the Cookie Disclaimer tab. This tab allows a system administrator to create customized text that appears when someone visits the Portal for the first time. This disclaimer explains the brand's cookie policy and can be used to link to a more detailed cookie policy page.
- Default Font - The font family that will be used by default for items created within or for the brand, such as ticket messages, canned replies, knowledge base articles, etc.
- SMTP Account - SmarterTrack does not have an internal SMTP server for sending replies to tickets, which
are standard email messages. Instead, it uses an existing email account that's configured on an existing mail
server or email service. Use this drop down to select the mail settings for brand-level notifications.
note: The options available in the dropdown list are based on the SMTP Accounts configured in the Email settings. If the necessary account is not listed in the dropdown, it is possible to add one by clicking Add SMTP Account. The new account will be added to the Email area as well. Once clicked, a modal window will display the following options:
- Server - The outgoing SMTP server name.
- Email Address - The email address from which brand messages are sent.
- Display Name - The name used to identify the mail server. This field is optional but recommended.
- Encryption - Select the level of security used for sending emails: None, SSL, or TLS.
- Server Port - The port used to connect to the SMTP Server. By default, the SMTP Server port is
25.
note: If SSL or TLS is used, this port will need to change to match the security setting.
- SMTP Auth Username - The identifier used to authenticate with the SMTP server. This field is optional.
- SMTP Auth Password - The corresponding password used to authenticate with the SMTP server. This field is optional.
- Ignore SSL warnings - Select this option to ignore any SSL warnings received when connecting the SMTP account. Generally, SSL warnings are just those: warnings. Ignoring them does not mean that there is something incorrect in the set-up.
- Default - Check this box to make the SMTP account that's set up as the Default SMTP account for the entire Brand.
- Master Templates - Master Templates are used for sending things like system messages, email Event
Actions, and Autoresponders.
note: SmarterTrack offers a default Master Template that will be used by any message that is not, or can not, be assigned to a Brand. Therefore, this default template should be kept simple so as to not confuse customers if multiple Brands are used in SmarterTrack. Multiple Master Templates can be created and customized for each Brand supported in SmarterTrack, and the appropriate Master Template can be assigned to a Brand when configuring its Options.
- Google Analytics Site ID - The unique identifier used to track your site in Google Analytics. Adding in a Google Analytics ID helps track visitors to all pages of your SmarterTrack site: the Portal, Management Interface, etc.
- Company Favicon - A favicon is an icon that is associated with a URL and displayed in a browser's address
bar or next to the site name in a bookmark list. Upload a custom favicon for the brand by clicking on Choose
File. Then browse for the ICO file. (Favicons must be uploaded in .ico format. Recommended sizes for a favicon
are 32x32, 64x64 or 128x128 pixels.) Click Save then navigate to the brand's Portal or refresh the Portal site
to see the new favicon. (In some browsers, refreshing the Portal 2-3 times may be required before the browser
will pull in the new favicon data.)
note: If multiple brands are configured, the favicon of the Default Brand will be displayed when viewing the Management Interface.
- Display logo on portal - Checking this box will display the company logo on the Home page of the Portal.
- Company Logo - The logo to use for the brand. Click on Choose File to upload an image. Remove Logo deletes the uploaded logo and reverts to the default, or you can upload a new company logo as needed.
Permissions
Use this tab to edit the following permissions for your brand:
- View Community - From the dropdown, select the Role necessary for portal visitors to view, and reply to,
various threads in the Community. If the Community needs to be hidden from everyone, this should be set to
Nobody and it's button will not be displayed on the Portal.
note: This selection also determines which users can privately message other users at the Portal. Community messaging is enabled for any Registered User with permission to view and participate in Community threads.
- Create Community Threads - From the dropdown, select the Role necessary for portal visitors to start new threads in the Community.
- Minimum Posts to Post Links - Administrators can now control the minimum number of Community posts a user must have before they can post links to other sites or services that are clickable. This is to prevent one-off, drive-by spamming of Community posts from single-post users. By default, this is set to 3.
- Post Links in Portal - Similar to the above, Administrators can limit the type of user that is able to post links in their signatures, in KB feedback, etc. By default, this is set to Registered User with Verified Email as these types of users are generally confirmed by a company.
- View Ticket Requires - From the dropdown, select the Role necessary for portal visitors to view tickets in the portal.
- View News Requires - From the dropdown, select the Role necessary for portal visitors to view News items in the portal.
- View KB Articles Requires - From the dropdown, select the Role necessary for portal visitors to view Knowledge Base articles in the portal.
- Users can change display name - Checking this box will allow users to change their display name. By default, this setting is enabled.
- Users can change email address - Checking this box will allow users to change their email address on file. By default, this setting is enabled.
- Users can change password - Checking this box will allow users to change their login password. By default, this setting is enabled.
- Users can change profile information - Checking this box will allow users to change their profile information on file. Profile information includes phone numbers, address, time zone and preferred language. By default, this setting is enabled.
- Users can upload custom avatars - Checking this will allow users to upload their own, custom avatars for display in the portal, such as in the Community.
- New feedback starts out moderated - Checking this box means that any new feedback left on a knowledge base article will first have to be reviewed and approved by a portal administrator before it is viewable by users. By default, this option is checked.
- Require approval for custom avatars - Checking this means that any custom avatar use will first need to be approved by portal administrators before they are displayed in the portal.
Portal
Use this tab to edit the following options for your brand's portal:
- Display live chat in portal - Checking this box will display a link to initiate a live chat throughout the Portal. By default, this setting is enabled.
- Display social network links - Checking this box will display social network links in the portal that will allow knowledge base articles and news items to be shared to these networks. By default, this setting is enabled.
- Display option to send ticket list by email in portal - Checking this box will allow users to request a list of their tickets be sent to them via email. By default, this option is enabled.
- Enable login form - Checking this box will display a Login button at the top of the Portal,
allowing users to log in to the portal. By default, this setting is enabled.
note: If this setting is disabled, Agents and Administrators can only log in by going to the exact URL of the management side of SmarterTrack, which is, by default, your-SmarterTrack-domain.com/Management/Root.aspx.
- Enable new user registration - Checking this box will display a Register button at the top of the Portal that allows visitors to register for an account for the portal. By default, this setting is enabled.
- Enable Gravatar support for automatic avatars - Gravatar is a service that allows users to maintain a singular avatar image for a consistent online presence across multiple different properties. It's a simple and efficient way to use the same avatar on multiple websites. Checking this box allows users to use their Gravatar images versus uploading a custom image.
- Enable voting for knowledge base articles - Checking this box will display helpfulness voting options on knowledge base articles in the portal for both end users and Agents.
- Ticket and Chat Privacy Policy URL - This is the direct link to your privacy policy, EULA, Terms of Service or whatever page that details your privacy terms, service terms, etc. that you want to put in front of your users. Checking the box next to Enabled inserts a message on the Ticket and Chat submission pages that a user must consent to prior to actually submitting a ticket or chat to your agents. The URL that's provided is used as the link for the Privacy Policy text that's part of this message.
- Chat Link Style - Use this dropdown to select the live chat link to be displayed on the portal. This is configured by going to Live Chat and selecting the Live Chat Links tab.
- Primary Color - This is the color for the main menu buttons on the portal (Home, Knowledge Base, News, etc.) and the titles of the news items on the News page. The default is (241 241 241) RGB or (#F1F1F1) HEX.
- Secondary Color - This is used for minor highlights such as lines, separators, asterisks, etc. that are used throughout the Portal. The default is (187 187 187) RGB or (#BBBBBB) HEX.
- Primary Button Color - The standard button color for buttons such as Start Ticket, Submit Thread and the icons on used for the Knowledge Base, Community, Tickets, etc. The default is (58 135 173) RGB or (#3A87AD) HEX.
- Secondary Button Color - The color for secondary buttons such as Search buttons. The default is (102 102 102) RGB or (#666666) HEX.
- Button Text Color - The color for text that appears in both primary and secondary buttons. The default is (255 255 255) RGB or (#FFFFFF) HEX.
- Content Background Color - The default color for the main content areas of the portal. The default is (255 255 255) RGB or (#FFFFFF) HEX.
- Navigation Bar Color - The color of the top bar of the portal, where the User, Alerts and language selection buttons reside. The default is (84 84 84) RGB or (#545454) HEX.
- Text Color - The color for the majority of text as it appears in the portal and on the community. This includes KB text, community posts, etc. The default is (51 51 51) RGB or (#333333) HEX.
- Link Color - This is the color for any hyperlinks on the portal, including those used to view knowledge base articles, links to view tickets and threads and any links within the KB articles or Community threads. The default is (0 102 147) RGB (#006693) HEX.
- Custom CSS Style Overrides - SmarterTrack allows
administrators to stylize their brand portals with fully customizable CSS. To modify a style, you should first
use a Web browser like Chrome to inspect the element that you want to modify. (Using FireFox's Firebug plug-in
will work as well). By inspecting the element you will see the class used and any styles associated with the
class. You can create a version of that style yourself and then paste it in this box to override the default.
Realize this will happen wherever that style is used, so changing one style can affect the portal in multiple
areas. To revert back to the default style, simply remove your custom style from here and save your changes.
note: To modify SmarterTrack's styles, it is strongly recommended that you have a good understanding of Cascading Style Sheets (CSS) and how to modify them.
Cookie Disclaimer
Many times, businesses want to make sure their privacy policies, cookie policies, terms of service or other information is presented to users of their Portal. To this end, it's possible to provide users with some generic text about these policies and/or terms as well as ensuring they agree to said policies and/or terms.
Since there are may ways for businesses to present their portal, and the information contained within the portal -- not to mention, different permissions for starting live chats or tickets with Agents -- storing a user's acceptance of the terms or policies provided needs to be accurate, yet generic enough to accommodate all uses of SmarterTrack. As such, a user's acceptance of the item lists in this area are stored as a cookie on the user's local machine. The cookie expires after a year, or when the policy text is changed by an administrator.
- Privacy, Cookie and Terms of Service Disclaimer - This is the text that is displayed in the modal pop up once the option is enabled. The modal appears at the bottom of the portal the first time a user visits. Ideally, this text lets users know that the portal uses cookies to store a user's settings changes, and can include login details if the user opts-in to saving these login credentials. Generally, this text is short but it should include a link to a more detailed privacy or cookie policy for your company.
- Disclaimer Modal Primary Color - This is the background color of the modal that displays the disclaimer text. By default, it's set to #237AFC.
- Disclaimer Modal Secondary Color - This is the color of the disclaimer text. By default, it's set to #FFFFFF.
Custom Links
In order to create a sense of community with end users, companies may want to expand their Portals and use them as hubs for disseminating news and information. One way to do this is to add custom links on their Portal to other websites and resources. For example, link to a blog, to a community forum, to a management interface and more. When adding custom links, administrators define the custom link title that is placed on the Portal and that links to a specific URL. Custom Links are different than external feeds in that External Feeds will actually extract snippets from the feed listed and display that text as a section on the Portal home page whereas Custom Links create new text that is displayed under the main portal buttons and that link directly to the link URL provided.
To create a new custom link, click Add in the content pane toolbar. A modal window will display the following options:
- Brand - Use this dropdown to specify the brand for which the link will display.
- Title - The link name displayed in the portal.
- Link URL - The URL to the linked website.
- Link Target - To specify how the linked site will open, select the appropriate option from the list. "_blank" is used most often as that opens the link in a new browser window or a new tab.
- Role Required - To specify which users have access to the link, select the appropriate role from the list. For more information, see Roles.
Autoresponders
Autoresponders allow system administrators to configure an automatic response that's sent to customers when they submit tickets to various Departments within SmarterTrack. SmarterTrack has default autoresponders that can be used, but they can be edited, or completely re-written, to include links to KB articles and additional resources that can help answer commonly asked questions. It's even possible to include new product announcements or other marketing-type material in autoresponders.
To edit an autoresponder, locate the autoresponder by its display name. Select it and click Edit in the content pane toolbar. (Alternatively, you can double-click on the autoresponder to open it.) A modal window opens that displays the following tabs:
- Options
- Display Name - By default this is filled out using the name of the Department that the autoresponder correlates to. However, if a generic message is to be used, this Display Name can be changed to whatever the System Administrator wants.
- Enable Autoresponder - Checking this box enables the autoresponder for use. An autoresponder must be enabled or it won't be sent as intended.
- Send Options - This allows administrators to choose when an autoresponders is used: Always, During Business Hours, or Outside of Business Hours. For example, an autoresponder may be created to let users know that they've submitted a ticket over a weekend, or when a business is closed for the day, allowing Brand owners to set some expectation of when a ticket sumbitted during these times may receive a response.
- Start Date / End Date - Just like autoresponders set up in an email client, SmarterTrack autoresponders can have start and end dates. When configured, these autoresponders will be used in place of any other autoresponders set up for a Department. This makes it easy to set up different autoresponders for holidays or periods of time when a different message needs to be sent to users.
- View Ticket Online Text - The anchor text of the link for the 'View This Ticket Online' variable. It is enabled by default when that variable is used in the autoresponder body.
- Browse KB Text - By default, the autoresponder displays a link to browse the knowledge base after the list of related articles. Administrators can specify the link text by typing the desired text in this field.
- KB Search Folder - The folder(s) SmarterTrack will search in before creating the list of suggested articles. By default, this is set to All Folders.
- Max KB Search Results - By default, the autoresponder displays a list of knowledge base articles related to the ticket content. This is the maximum number of suggested knowledge base article links included in the text of the autoresponder. By default, this is set to 5.
- Contents
- Departments
This is where the actual message that is sent is written out. By default, SmarterTrack fills out a formatted message that includes several system variables for things like Ticket Number, Department Name, etc. that are automatically inserted into the reply. System Administrators can reconfigure these messages or change them entirely using the complete HTML editor.
Use this tab to select the Departments that will use this particular autoresponder. Generally, you can set separate autoresponders per Department, but when a start and end date are necessary, the same autoresponder can be used for any or all Departments that have been set up in SmarterTrack.
Business Hours
Use this tab to specify the days and times the organization operates and when staffing is available. To edit or remove a day, select the desired day and click Edit in the content pane toolbar. To remove a day from your business hours, delete the start and end times and save your changes. This will deselect that day and remove it from the brand's available business hours. That day will then be displayed as Closed.
Holidays
Use this tab to specify company holidays. To add a holiday, click Add in the content pane toolbar.
Custom Messages
Use this tab to create custom messages to be displayed on the portal.
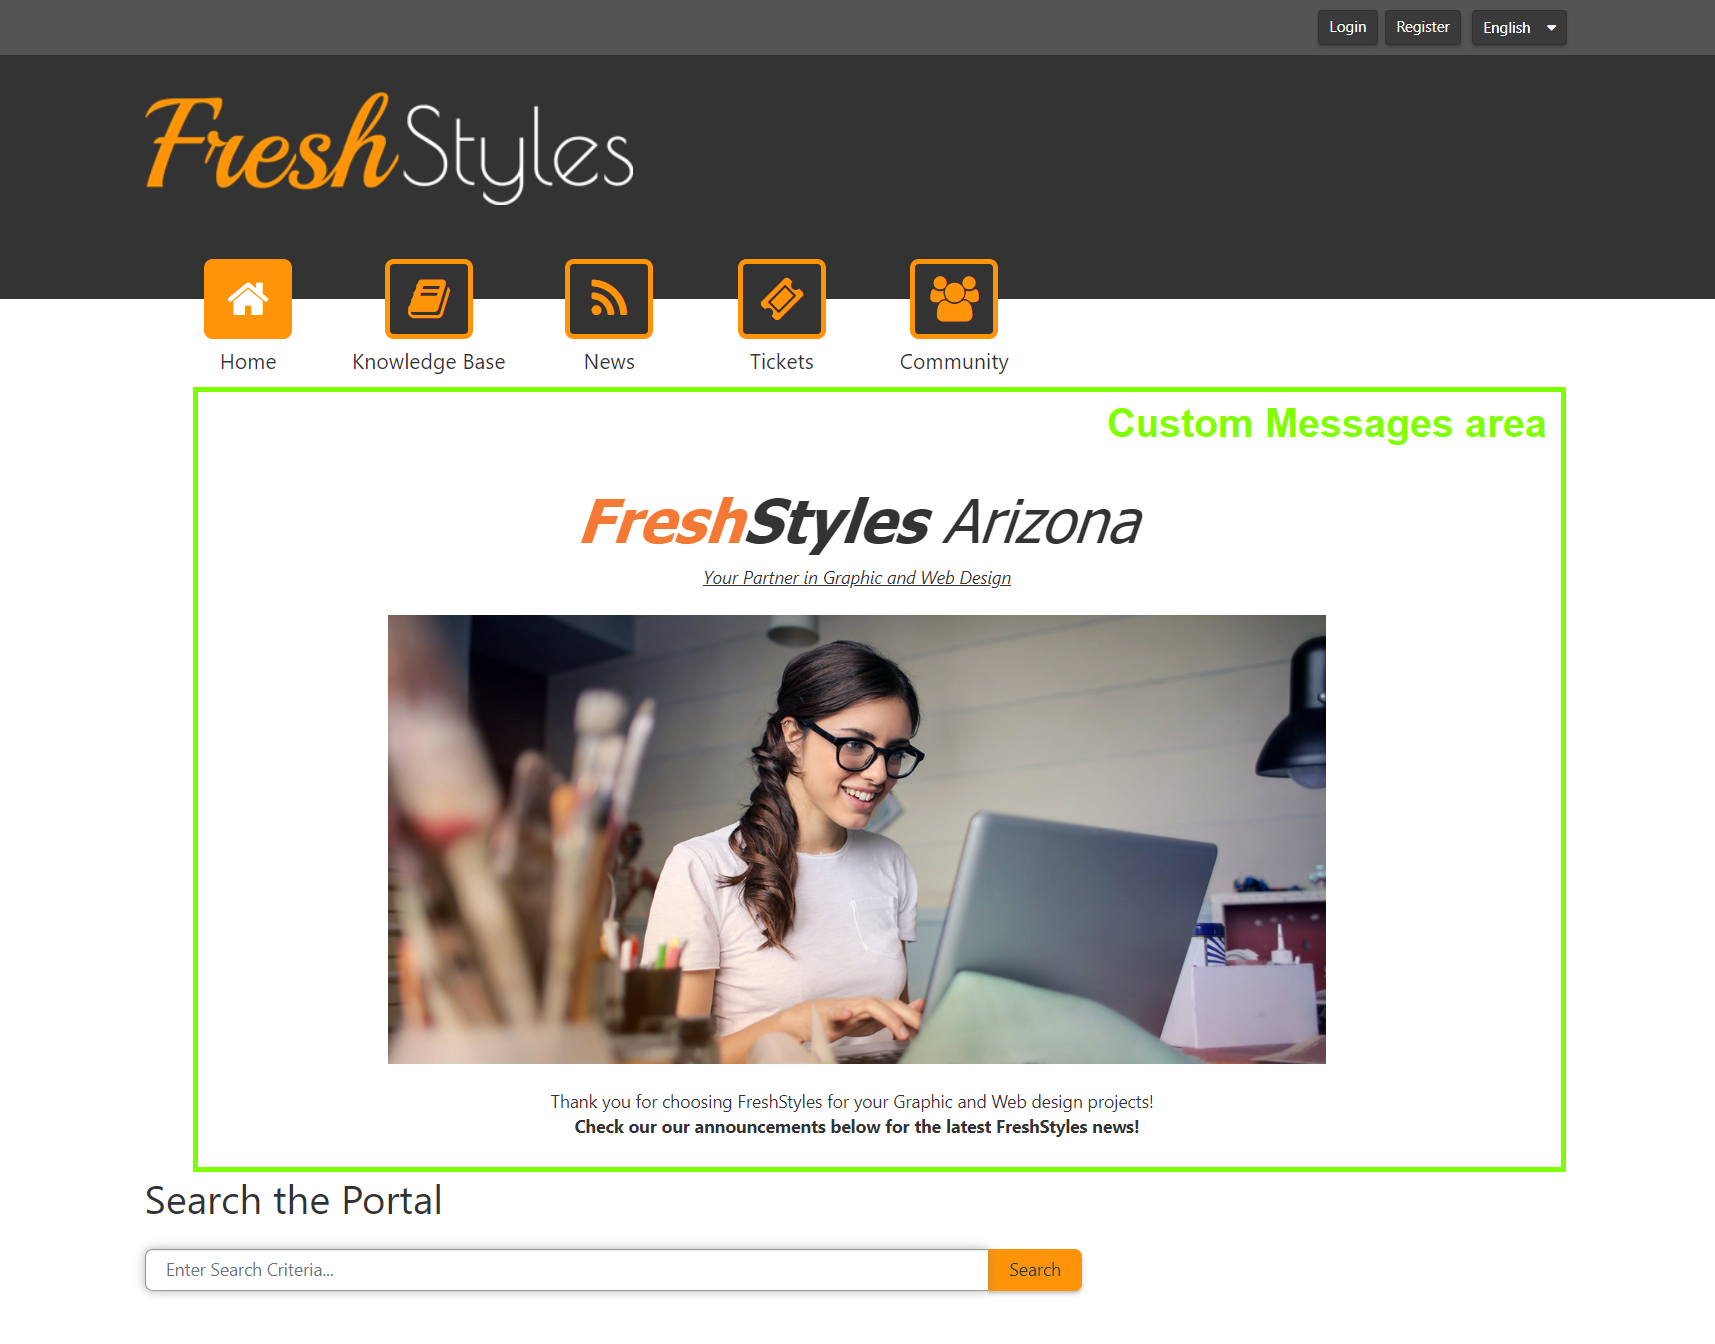
- Main Portal Announcement - The text that displays on the portal home page. Some companies may choose to write a welcome message or a description of the types of services customers might find on the self-service portal. Others may want to add graphics, banner ads or more to completely brand and customize how the portal looks for visitors. The Main Portal Announcement offers a complete HTML editor that allows all manner of customization. Regardless of what's added, the announcement will appear at the very top of the main content area of the portal.
- Additional Footer for Portal - The text that displays at the top of the portal footer above the SmarterTools copyright information.
Community Categories
SmarterTrack's Community is a centralized location brands can use to communicate with customers and end users, which is a key for any business. Categories are used to separate threads within the Community and can be things like keywords, product names, general categories like "General Discussion", and more. By default, there aren't any categories created for new installations. This allows a business to fully customize what's discussed in their community. To add a category, click the Add button in the content pane toolbar and the Category modal appears. Add in the category name, and the role required to post to that category. (Be default, the Everyone role is selected.) Once a category is added, it will appear as an option, along with your other categories, for any new Community threads. For more information or roles, see Roles.
Customizing Survey Appearance
Administrators can now customize survey appearance to match branding and improve engagement. Basic color settings are available, allowing adjustments to background, header, and text colors so surveys align with your brand’s visual style.
How to Configure
- Log into the SmarterTrack management interface as an administrator.
- Navigate to the More button, click on Settings from the menu → Brands → Click ln your Brand name.
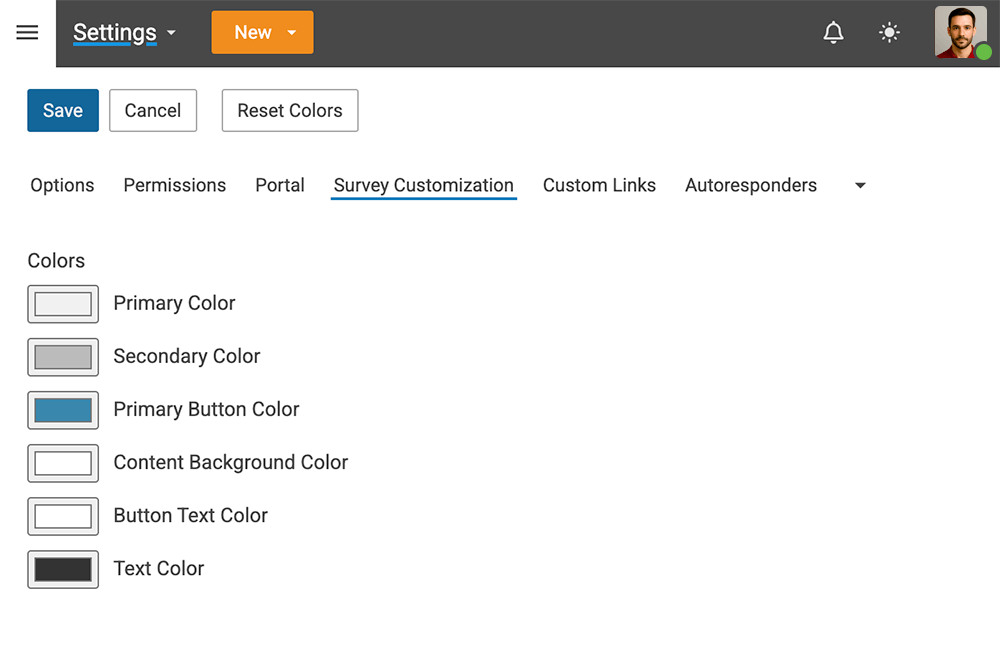
- In the Brands panel, click on Survey Customization .
- Select colors for the Primary Color, Secondary Color, Primary Button Color, Content Background Color, Button Text Color and Text Color.
- Click on the Save button.
What You Can Customize
- Primary Color - This is used for the header background for the Thank You page. The default is (187 187 187) RGB or (#BBBBBB) HEX.
- Primary Button Color - The standard button color for buttons. The default is (58 135 173) RGB or (#3A87AD) HEX.
- Content Background Color - The default color for the main content areas of the survey. The default is (255 255 255) RGB or (#FFFFFF) HEX.
- Button Text Color - The default color for the main content areas of the survey. The default is (255 255 255) RGB or (#FFFFFF) HEX
- Text Color - The color for the majority of text as it appears in the survey. The default is (51 51 51) RGB or (#333333) HEX.
Logo and HTML Text Support
Surveys can be customized with a company logo and enhanced messaging using an HTML text editor. These features give businesses greater control over survey branding and presentation, creating a more professional and engaging experience for end users.
How to Configure:
- Log into the SmarterTrack management interface as an administrator.
- Navigate to the More button, click on Settings from the menu → Brands → then click on your brand name.
- In the brand settings, open the Options panel.
- Type in the Company Website URL.
- Upload your Company Logo for branding across the portal.
- Click Save at the top of the page to apply your changes.