User Defaults
For domains that have a large number of users, it can be time-consuming to make a change to user settings — increase the Mailbox Size Limit or disabling the ability to change passwords, for example — and then ensure the changes are applied to all users. With User Defaults, however, domain administrators can create a template for the default user settings so that they only have to make the change in one location, and then propagate those settings to a select few users or each user on the domain. This makes changing settings quick and easy and ensures each user has the exact same permissions and settings applied.
User Defaults
To review the default configuration for new users, click on the User Defaults button. The default user settings shown here are identical to the settings found when adding or editing an individual user. For more information, refer to the Managing Users help topic.
You can make whatever changes you want to these settings, and any NEW accounts that are added will use these defaults. However, it's also possible to change these settings, then push those settings to one or more users individually, or to all users. In the case of pushing changes to individual users, say you have a set Mailbox Size Limit set for all users of 2000MB (2GB). However, the C-Level execs need more. It's possible to change that limit to something higher — 8000MB (8GB), for example — and then push that change to all the accounts set up for the C-Level executives.
Propagation
To apply some or all of the default user settings to some or all of the existing users on the domain, do the following:
- First, make any changes you want on this page, then click the Save button.
- Next, click on the Propagate button. A modal window opens up.
- Scroll down the list of settings, placing a check mark next to the settings you want to push to your user(s).
- Once all items have been selected, you can pick who you want to propagate the changes to:
- Specific Users - Selecting this allows you to start entering the users you want to propagate the changes to. These changes will only propagate to the users you enter.
- All Users - This will propagate the changes to all users of the domain.
- Once you've selected your changes, and added the specific users you want to propagate the changes to, click the Propagate button.
Account
This is the default mailbox size for users, in Megabytes. Out of the box, SmarterMail sets this to 1000MB (1GB) for new users, but it can be changed to whatever value makes sense for the domain. Entering "0" here removes the size limit entirely for any new user created — a setting most administrators avoid, since it removes a safeguard against a single mailbox consuming an unbounded amount of disk space.
User
- Language - The language a user selects/sets for use in SmarterMail is EXTREMELY important. That's because it's much more than simply what is seen in the webmail client. SmarterMail's language selection is the basis for everything: the things you see in the webmail interface as well as what's returned to an email client when you connect using Outlook, eM Client, iOS Mail and more. That includes things like settings labels, folder names, calendars and calendar appointments, contact groups, email message content, log files and essentially everything within SmarterMail. Therefore, it is extremely critical that whatever language is set in SmarterMail is the language you actually want to use.
- Changing Language Settings: When a user tries to update their language, SmarterMail checks for potential conflicts prior to changing the language. For example, if a user is set to English and they have a folder named "Bandeja de entrada", if they try to change their language to Spanish, the change will not be saved and they will see a warning letting them know that the language wasn't updated to prevent an email folder name conflict. This is because "Bandeja de entrada" is the Spanish name for Inbox used in the default Spanish language translation file. If the change was saved, there would be 2 folders with the same name, which would cause issues.
- Time Zone - The time zone of your location. This field determines the timestamp for items within the interface, including the date and time messages were received or a Note was updated.
- Plus Addressing - Plus addressing allows users to automatically sort incoming email without creating content filtering rules first. One of its major benefits is that it allows users to generate special email addresses if they do not want to give out their real address. For example, if user@example.com needs to provide a valid email address to sign up for a newsletter, he can sign up for the newsletter using the following address: user+technewsletter@example.com. When the newsletter is delivered, it can automatically be routed to the Technewsletter folder. If the folder does not already exist, it can be created automatically. In addition, sub-folders and/or folders with spaces can be created as part of a Plus Address. If you include the "/" character in your plus address, you can automatically create subfolders. For example, the plus address myname+Newsletters/ACME@example.com will create a folder called Newsletters, then create an ACME folder under it, and drop the newsletter into the ACME folder. Using an underscore (_) in the folder name will create it with a space. For example, myname+acme_newsletters will create a folder called Acme Newsletters. As an added bonus, you can connect to folders in your email using POP3 by using plus addressed emails. The example above, when input into your POP email client as your login name, will return the contents of that folder.
- Disabled - Select this option to turn off plus addressing for your account.
- Move to Folder - If the target folder already exists, the incoming message will be placed into it. If the folder does not exist, it will be created automatically.
- Move to Folder (If Exists) - If the target folder already exists, the incoming message will be placed into it. If the folder does not exist, the email will be placed in the Inbox.
- Leave in Inbox - The incoming message will be placed in the Inbox.
- Show in Global Address List Enables or disables the user from being displayed in the GAL. Some users, especially generic ones (hr@, billing@, etc.) may not need to be displayed in the GAL.
Service Access
This card can be used to adjust a user's access to the standard protocols that SmarterMail utilizes. For example, you can limit services like POP, IMAP and SMTP so that specific users are not able to connect their email accounts to external email clients. The following services can be managed for each user:
- Webmail - Enable this option to allow users to log into SmarterMail from the webmail interface.
- POP - Enable this option to allow users to download mail to an email client using POP3.
- IMAP - Enable this option to allow users to create a two-way email sync between SmarterMail and an email client using IMAP.
- Inbound SMTP - Enable this option to allow users to receive email from external senders. That is, any user outside their own domain. (So, from Gmail, etc.)
- Outbound SMTP - Enable this option to allow users to send email to external recipients. That is, any user outside their own domain. (So, to Gmail addresses, etc.)
- Chat - Enable this option to activate SmarterMail's included Chat feature for users.
- WebDAV - This will give users the ability to set up accounts to sync calendars (calDAV) and/or contacts (cardDAV) to various mobile and desktop clients that support this protocol.
- EAS (Enterprise Only) - This will give users the ability to set up Exchange accounts on mobile email clients, contacts and calendar apps, etc.
- MAPI/EWS (Enterprise Only) - This will give users the ability to set up Exchange accounts in Microsoft Outlook for Windows, Outlook for Mac, Apple Mail and eM Client.
Webmail
This card covers how to access the SmarterMail web interface using your preferred browser. To adjust these settings, log in to your SmarterMail account, click the More button, scroll down to Settings, and you'll find the Webmail card in your Account. For a list of supported browsers, see Browser Requirements.
- Compose Font - Specify the default font for emails by selecting an option from the list.
- Font Size - Specify the default font size for emails by selecting an option from the list.
- Default From Address - Select the email address that you reply from by default for messages sent through webmail. Your SmarterMail email address and any domain aliases or SMTP accounts configured will be shown in this list. (This setting does not prevent you from manually changing the Send From address when composing a message.)
- Preview Pane - To specify where the preview pane displays in the webmail interface, select the appropriate option from the list: Right or None. By default, the preview pane appears to the right of the messages list. Disabling the Preview Pane means only a list of messages appears in the content pane and each message will need to be opened separately in order to view their contents.
- Search Language Indexer - The language that the Lucene indexer will index against. In most cases, Generic Indexer is the best selection as it incorporates English and common umlauts. However, if the interface is viewed in certain languages, such as Chinese, Japanese, or Korean, this setting should specify the language for better indexing results.
- Use received address from message on reply - When enabled, replying to a message via webmail will use that email's To: field as the From: address for your reply. This means messages sent to your main SmarterMail email address, to a domain alias, to an email alias, to an SMTP account, to a disposable address or even to a Plus address will have replies sent from those same addresses. For example, if an email is sent an alias you are part of (e.g., office@your_domain.com), when you reply to that email via webmail, the reply will be sent from office@your_domain.com. The same holds true for domain aliases. If you have your_domain.com as the primary domain, and a domain alias of your_other_domain.net, and an email is sent you your_name@your_other_domain.net, when you reply to that email using webmail, the reply is sent FROM your_name@your_other_domain.net. (This setting does not prevent you from manually changing the From address when composing the reply in webmail.)
- Request read receipts by default - Select this option to automatically request read receipts for all outgoing messages sent via webmail. When this setting is enabled, all outgoing messages that are sent via webmail will request that the recipient(s) send a read receipt when the message has been read. If the read receipt is sent by the recipient(s), you will receive a message from the system administrator confirming that the message has been read.
- Request delivery receipts by default - Select this option to automatically receive delivery receipts for all outgoing messages sent via webmail and email clients. When this setting is enabled, you will receive a message from the system administrator verifying the delivery status of your outgoing message.
- Draft auto-save - Enable this option to have drafts of messages created within the webmail client to be saved every 2 minutes.
- Hide email avatars in the message list - Enable this option to hide any avatars — images, monograms, Gravatar pictures, etc. — from your list of messages. This disables avatars for all folders, including custom folders. It does not have any effect on messages, or messages that display in the content pane.
- Email Classification - Enable this option so SmarterMail will automatically begin classifying messages into one of four categories: Primary, Transactions, Updates, or Promotions. Users will have the ability to display / hide the classifications for messages by clicking the Classifications button at the top of their list of folders.
- Show images from external websites - Enable this option to automatically display all in-line remote content when an email is viewed. (Remote content is considered to be any image, video, animated gif, etc. that has an external source and is contained in the message.) When this is enabled, you will not have to manually display the remote content on emails you receive; it will be visible automatically.
This card applies to configuration in email clients such as Outlook, eM Client, Apple Mail, Windows Mail, Spark, Thunderbird, Mailbird, and others. To adjust these settings, log in to your SmarterMail account using the web interface, click the More button, scroll down to Settings, and you'll find the Email card in your Account. For details on supported email clients, please refer to Synchronizing with SmarterMail.
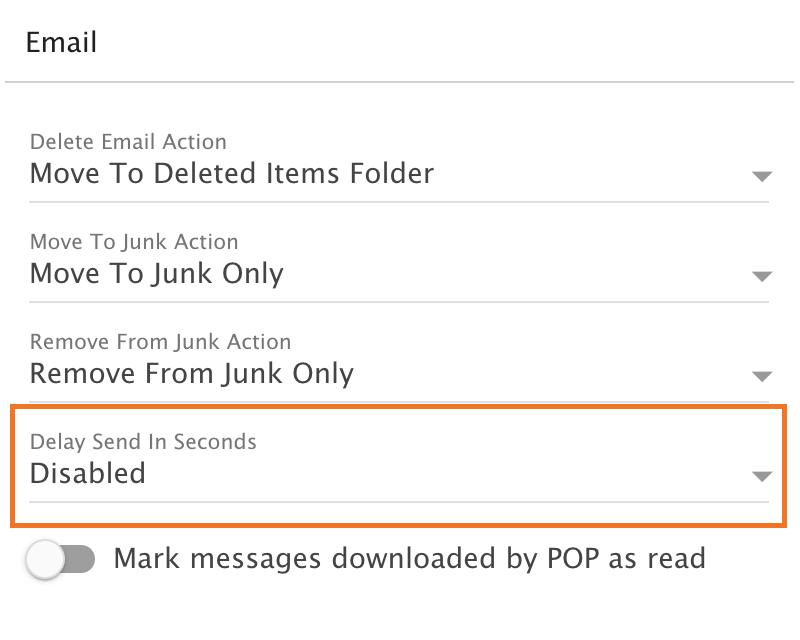
- Delete Email Action - To specify the action performed on deleted email messages (not folders — deleted folders and their contents will always go to the Deleted Items folder), select the appropriate action from the list.
- Move to Deleted Items folder - Deleted items will appear in the deleted items folder, which will need to be regularly emptied.
- Permanently Delete - Permanently deletes and purges the message.
- Mark as Deleted - Flags the message for deletion, but it does not move messages to the Deleted Items folder and messages remain until the folder is purged.
- Move to Junk Action - Using Move to Junk moves the email to your Junk Email folder, and also helps the system recognize the sender and message contents as possible spam. This information is used to help train new HAM/SPAM settings that are available to system administrators.
- Move to Junk Only - Emails will be sent to the Junk Email folder, so you'll want to check this folder and clear it out every now and then.
- Move to Junk and Block Sender - Emails from this sender will go straight to your Junk Email folder, and the sender's email address will be added to your Blocked Senders list. Be sure to check and clear your Junk Email folder periodically.
- Move to Junk and Block Domain - Emails from this domain will go straight to your Junk Email folder, and the email domain will be added to your Blocked Domain list. Be sure to check and clear your Junk Email folder periodically.
- Remove from Junk Action - Removing an email from Junk moves it to any folder you choose, whether your inbox or a custom folder you've created.
- Remove from Junk Only - Removing an email out of Junk will place it into any folder you choose, whether it’s your inbox or a custom folder you’ve created (this is the default action).
- Add to Trusted Senders - Enabling this setting will will move the email from your Junk Email folder to a folder of your choice, such as your Inbox or any custom folder you've created. The sender will also be added to your Trusted Senders list.
- Remove from Junk and Remove from Block - Enabling this setting will will move the email from your Junk Email folder to a folder of your choice, such as your Inbox or any custom folder you've created. The sender or their domain will also be removed from any blocks added, based on your Move to Junk action.
- Delay Send in Seconds - This setting adds a built-in delay before a message is sent to its intended recipient(s). The delay can occur in the following increments (in seconds): 5, 15, 30, 60. (This is set to 5 seconds by default.) Users who don’t want any delay can set the Delay Send in Seconds field to “Disabled.”
- Mark messages downloaded by POP as read - Enable this option to mark all messages that are downloaded via a POP3 connection as read.
Throttling
Throttling limits the number of messages sent per hour and/or the amount of bandwidth used per hour to send messages. Domain administrators can use this feature on a per-user basis to either delay or reject messages that exceed their desired limits, thereby ensuring users don't send out massive amounts of email throughout the day that can possibly get the domain blacklisted.
- Outbound Messages per Hour (0 = Unlimited) (Default = 1000) - The number of messages sent by the user per hour.
- Message Throttling Action - Select an action for SmarterMail to take once the particular throttling level is reached. Of course, administrators can elect to do nothing at all, or they can either Delay or Reject messages until the amount of mail being sent falls beneath the throttling limit that is set.
- Outbound Bandwidth MB per Hour (Default = 100) - The total number of MBs sent by the user per hour. 0 is unlimited.
- Bandwidth Throttling Action - Select an action for SmarterMail to take once the particular throttling level is reached. Of course, administrators can elect to do nothing at all, or they can either Delay or Reject messages until the amount of bandwidth being used falls beneath the throttling limit that is set.
- Bounces per Hour (Default = 500) - The number of non-delivery reports (NDRs, or "bounces") a user's outbound mail can generate in an hour before throttling kicks in. A high, sudden bounce rate is one of the clearest signs of a compromised account being used to send spam to invalid addresses, so this threshold exists specifically to catch that scenario — independent of the raw outbound message count, which a careful spammer might otherwise keep just under the "Outbound Messages per Hour" limit.
- Bounce Throttling Action - Select an action for SmarterMail to take once the bounce throttling level is reached: do nothing, Delay, or Reject further outbound messages from the user until the bounce rate falls beneath the configured limit.