Signatures
An email signature is a block of text automatically appended at the bottom of an email message. Signatures may contain the sender's name, address, phone number, disclaimer, or other contact information. In addition, SmarterMail allows users to create HTML formatted signatures that can include stylized text, links, images, etc. For example, a signature can contain a company logo and tagline, an image that links to a personal or business social media account, or even links to other properties, like a company's help desk or management interface.
There are a couple of different pieces to using custom signatures:
- Creating the actual signature, and
- "Mapping" that signature to the address, or addresses, that should use it.
When accessing Signatures, the following cards will be available:
Signatures
The Signatures card lists any signatures you've created, and you can create as many as you need — say, a formal one for customers, a short one for internal mail, and a bare one for mailing lists. To create a new signature, click New Signature. In the window that opens, enter a friendly Name and then compose the signature content using the HTML editor, which offers full text formatting plus the ability to insert images, links, and tables. (Clicking an existing signature opens the same window, where it can be edited or deleted.)
Signature Variables
Below the editor is a list of variables that can be used within a signature. Variables are placeholders, wrapped in # signs, that are replaced with your actual information when a message is sent — simply type or copy one into the signature body. Most of them pull from your Profile, so the more complete your profile, the more useful they are. The available variables include:
- Identity - #DisplayName#, #FirstName#, #MiddleName#, #LastName#, #JobTitle#, #Department#, #Office#, #CompanyName#
- Contact details - #WorkPhone#, #MobilePhone#, #HomePhone#, #WorkFax#, #HomeFax#, #Pager#, #IpPhone#, #WebSite#
- Addresses - #WorkAddress#, #WorkCity#, #WorkState#, #WorkZip#, #WorkCountry#, plus the equivalent Home... variables
- Email details - #PrimaryEmail#, #SendingEmail#, #PrimaryDomainName#, #SendingDomainName#. The "Sending" variables reflect the actual address a message goes out from, so one signature can serve several aliases.
- Miscellaneous - #Date#, #Time#, #BirthDate#, and #ContactPicture#, which embeds your profile picture as an image.
Using variables makes signatures easy to maintain: a signature containing "#DisplayName# — #JobTitle#, #CompanyName#" updates itself automatically if your title changes in your profile, and a domain-wide signature built from variables personalizes itself for every user.
Mapped Field
The Mapped Field card assigns signatures to the addresses you send from. It lists your primary email address plus any SMTP accounts, email aliases, or domain aliases configured for your account, each with its own dropdown. For each address you can choose None, one of your signatures by name, Use Primary Signature (use whatever your primary address uses), or Use Domain Signature Setting (use the signature configured by your domain administrator). This means, for example, that mail sent from your sales alias can automatically carry a different signature than mail sent from your primary address.
If multiple signatures are available, you can also change the signature on a per-message basis: a Signature dropdown appears in the webmail compose window (next to the From selector), and choosing a different signature swaps it in the message immediately. (When the domain administrator has enforced a signature for the address you're sending from, this dropdown is disabled.)
A Practical Example: Adding an Image
How to add an image to a signature is, believe it or not, one of the most common questions we get from users. It's actually a pretty easy thing to do, and there are a few different ways to do it:
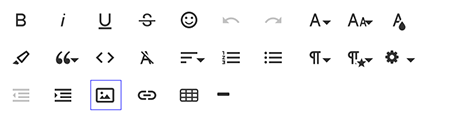
- Use the Insert Image button in the toolbar — By far the simplest way is to use the Insert Image button in the editor's toolbar. Simply create your signature, put the cursor where you want the image, then use the button. You can then format the image to whatever size you need.
- Add an image to your Profile — Do this by going into your Profile, and clicking on the image box next to your display name. You can upload an image — a logo, a headshot, etc. — and then use that image as part of your signature using the #ContactPicture# variable.
- Edit the HTML to insert an image — The HTML editor gives you the ability to edit the HTML code that's generated when you create a signature. You do this by first expanding all of the HTML editor tools, then clicking on the "View Code" button. Once you see the HTML for your signature, you simply edit it to add an <img src=""> that points to the location of the image. The image can be hosted on your website or via a third-party image hosting service. Hosting the image externally like this keeps your messages small, though recipients whose mail clients block remote images may need to allow them before the image displays.
- Use a third-party service — This is a bit of a different approach, but there are services out there that allow you to create very intricate and dynamic email signatures. These signatures, then, can be added using the HTML editor or even added as signatures in email clients. There is some debate about the efficiency, much less the necessity, of doing this, but the services are out there and they are an option for you.
Regardless of how you choose to do it, adding an image to your signature is not only easy, it adds a bit more personalization to your messages.