Installation and Upgrade
SmarterMail comes as a single installation file that contains everything necessary to run the product and get it set up on your server, regardless of the Edition that you intend to use. The features available are based on the license used during the activation process; if no license is entered, the Free Version will be installed. SmarterMail installers are available on the SmarterMail Downloads page of our website.
Jump to:
- Installing SmarterMail for the First Time
- Upgrading SmarterMail
- Things to Know
- Manually Installing SmarterMail
- Upgrade Process
- Upgrading Failover Servers
- Steps for Upgrading Legacy Versions
Installing SmarterMail for the First Time
Once you've downloaded the installation file from the SmarterTools website, it's time to actually install the product. SmarterMail starts by installing its mail service. This includes setting up all folders and directories needed to run SmarterMail. Therefore, it's just like any standard program installation:
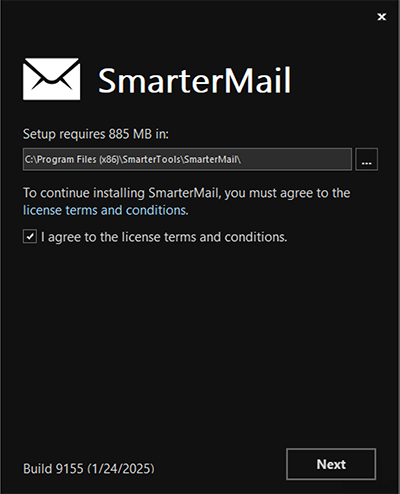
- On the first page, you select the path for the installation and accept the license terms.
- Next, you'll input any licensing and activation information:
- Free Edition - Select this if you're going to test out SmarterMail. The Free Edition is essentially SmarterMail Enterprise (with some limitations) and works for a single domain and up to 10 email accounts.
- Enter a license key - If you have purchased SmarterMail, select this: you'll then be prompted to enter the license key so the product can be activated.
- Manual activation provided by support - In some systems, those locked behind strict network security policies for example, SmarterMail is used for internal purposes only. In these cases a "manual activation" of the product is necessary. These are provided by the SmarterTools support team.
- Once the activation information is provided, you'll see an overview of the SmarterMail version and mailbox allocation.
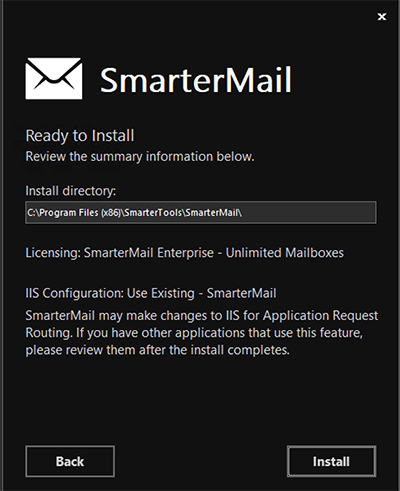
- Next, you provide some information about how SmarterMail appears in IIS: the Site Name, a Hostname, IP and Port (if these are needed — by default, SmarterMail binds to localhost on all IPs over port 9998). You can also change where SmarterMail installs by modifying the default File Path.
- Finally, you're given an overall summary of the installation. Clicking Install will install SmarterMail.
- On new systems, that haven't had SmarterMail installed, the installation process takes care of any additional set up and configuration that's necessary: setting up SmarterMail in IIS with an application pool and website, setting the proper permissions on both, etc.
- After the installation completes, you'll be presented with the Welcome to SmarterMail screen.
Welcome to SmarterMail
After SmarterMail is installed, a window opens in your default browser that takes you to the web interface for your installation. The URL used will match what was configured during the setup process, and if nothing was changed (e.g., no changes to the hostname or port), your browser will open localhost:9998/interface/setup#/.
The first thing you'll do is select which version of SmarterMail you want to install: Professional or Enterprise, or SmarterMail High Availability.
- SmarterMail Professional or Enterprise - This is the typical, single server installation of SmarterMail.
- SmarterMail High Availability - This is the installation process for installing a node (either the first node or subsequent nodes) that resides in a SmarterMail High Availability cluster. SmarterMail High Availability requires a partnership with SmarterTools. For more information, contact sales@smartertools.com.
After selecting your installation type, you'll set up a few pieces of information to get started using SmarterMail:
- You'll create the primary system administrator account
- You'll set the default base path for storing all SmarterMail data. This includes domain data, spool, log files, and POP and IMAP retrieval data, etc. By default, this path is C:\SmarterMail\
Once you have set up this information, you will be redirected to the webmail interface and automatically logged in to SmarterMail using the system administrator you created. From there, you can add in your first domain, then add users to that domain, you can modify your default domain template, adjust the security settings as needed, and more.
Upgrading SmarterMail
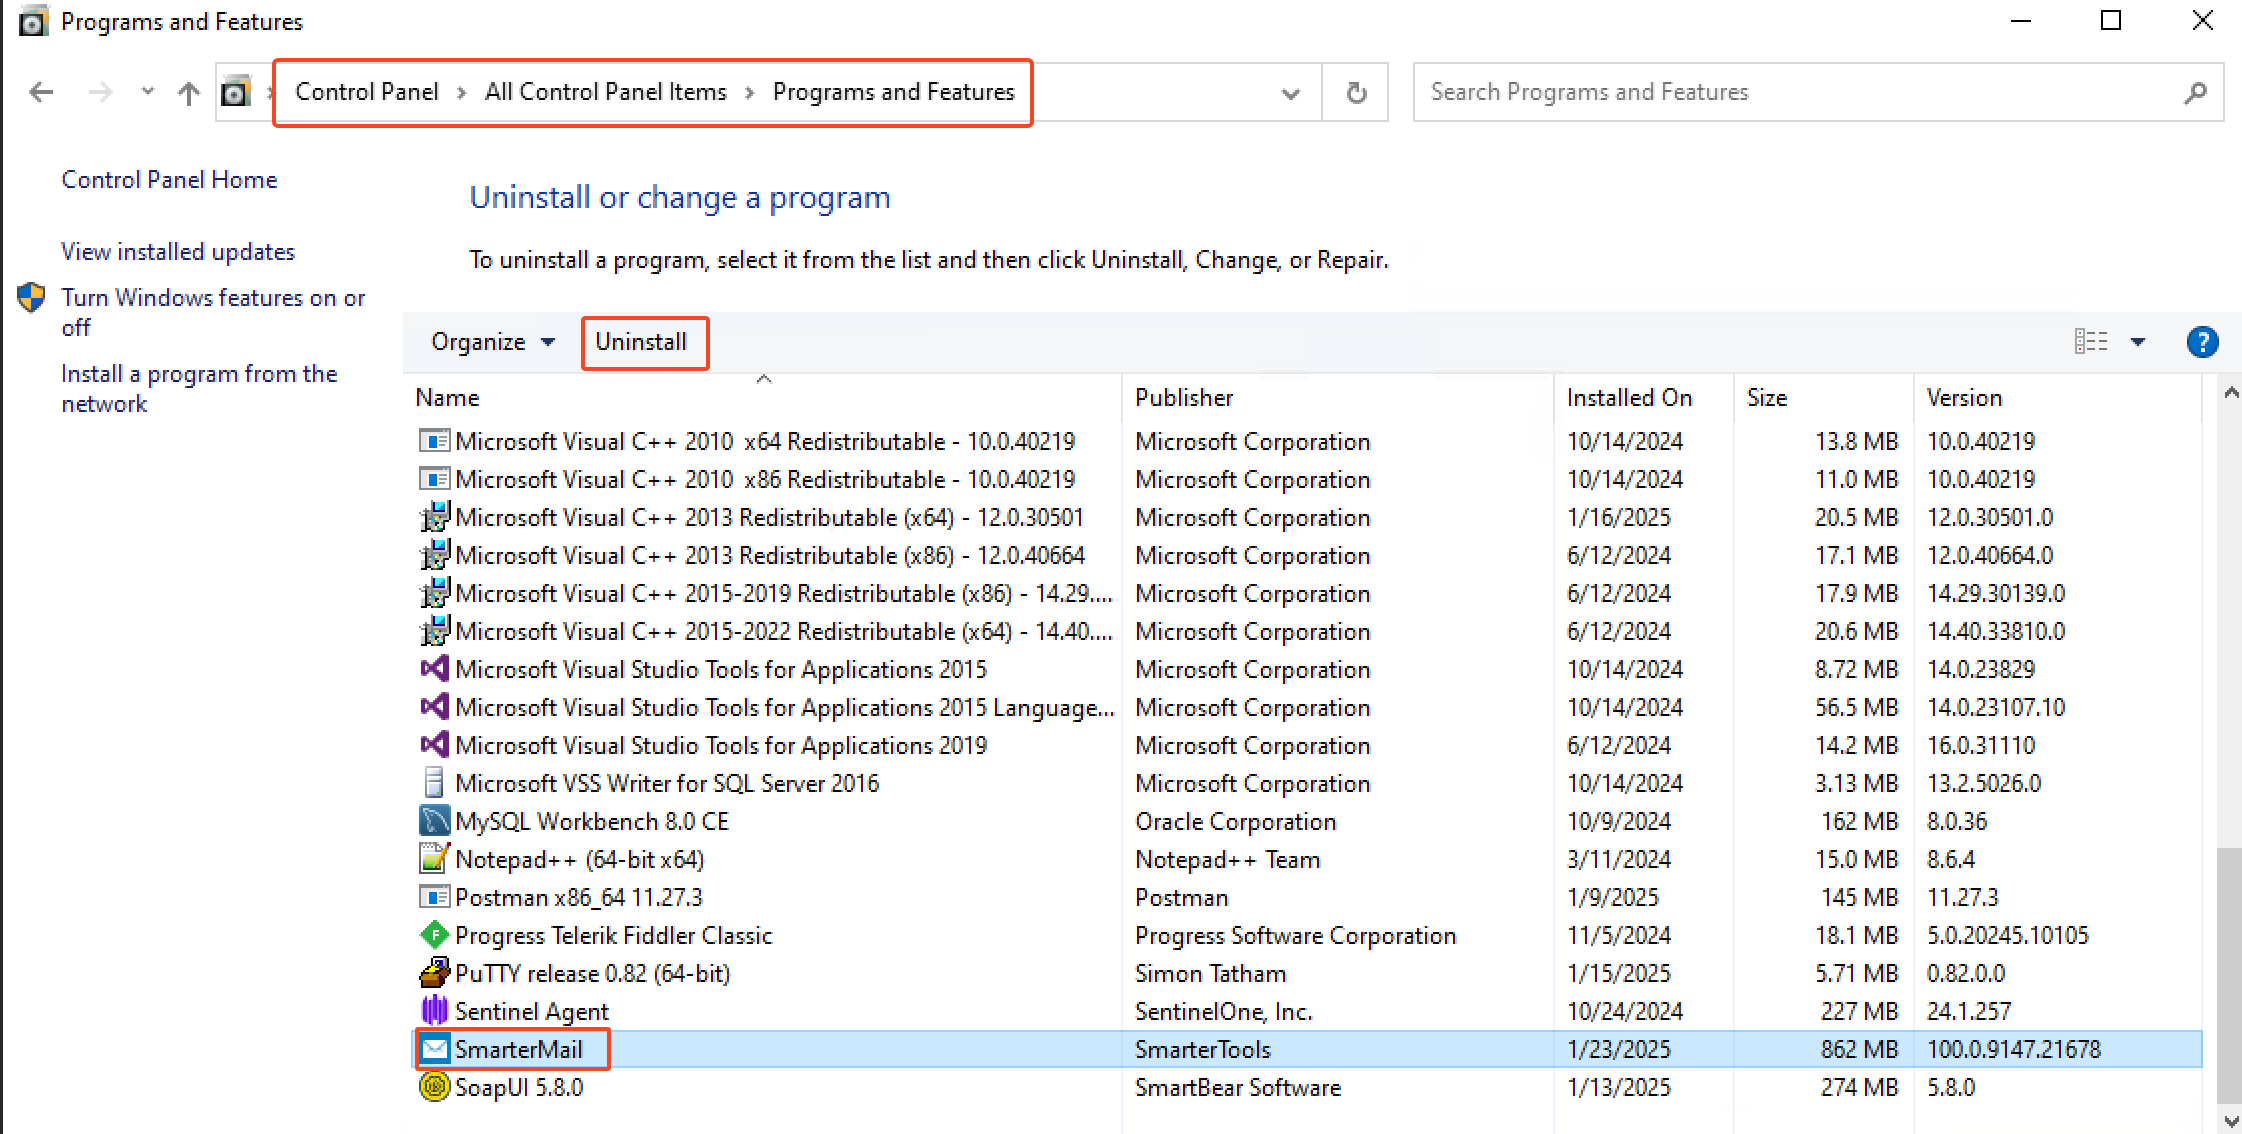
Upgrading SmarterMail is a very simple process: you simply uninstall SmarterMail using Add Remove Programs, then run the installer you download from the SmarterTools website. Yep, it's really that simple. For those worried about uninstalling first, when you use Add Remove Programs, only SmarterMail's program files are removed: NONE of the data files are touched. So all of your users, domains, settings — all of it — is perfectly preserved and ready to use after you install the new version you want to run.
Things to Know
While the installation of SmarterMail is quick and easy, there are a few things to be aware of, especially if you're upgrading from a Legacy version of SmarterMail (SmarterMail 16.x or earlier) to a new Build:
- Due to significant back-end changes in recent versions of SmarterMail, it is not possible to roll back to a version earlier than Build 8495 (April 5, 2023).
- When performing an upgrade from a legacy version to the most recent current Build, all domains will go through a conversion process and all users will be re-indexed. The re-indexing of users is handled in batches, so it can take time to complete, especially if you have a lot of users on the server.
- This conversion process should go smoothly, and it can be tracked by going to https://your-smartermail-domain/interface/convert-status. You will need to log in with the system administrator account, but that page will list every domain on the server and its status as the conversion happens.
- If you run into errors at any point during the conversion process, please contact the SmarterTools Support Department. Be sure to provide a screenshot of the errors you're seeing in the SmarterMail interface as well as the conversion.log file from your SmarterMail Logs folder. (The default path is c:\SmarterMail\Logs.) Please send the full log file or copy and paste the snippet of text containing the domains showing an error.
- Legacy Versions of any product can be downloaded from your Account area. Simply log in to your account, and from the Account dropdown icon, select "Legacy Versions". Here you'll have access to any current Build plus the most recent release of any Legacy product.
- The Release Notes for all major and minor versions of SmarterMail, as well as Release Notes for all current Builds, are available on the SmarterMail Release Notes page of our website. It's a great idea to familiarize yourself with all the changes that have been made to SmarterMail between the version you're on and the version you'll BE on once you've upgraded.
- To ensure that the upgrade maintains the integrity of your data, settings, users, file structure, etc. it's important to keep any default settings "as is" during the installation of the upgrade. Only change default settings if they were changed for the version you're upgrading from. File paths, etc. should match exactly. For reference, the default installation file path for SmarterMail is C:\Program Files (x86)\SmarterTools\SmarterMail.
- If you are upgrading an installation that utilizes a license key, you WILL need to re-activate that key once the upgrade completes. Please be aware that license keys pertain to the version of SmarterMail you're running as well as the maximum version of SmarterMail you CAN run — you cannot activate a key on a more recent version of SmarterMail if your key does not support that version. However, all license keys are retroactive for previous versions.
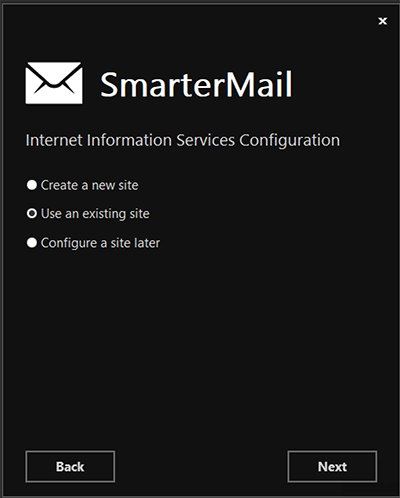
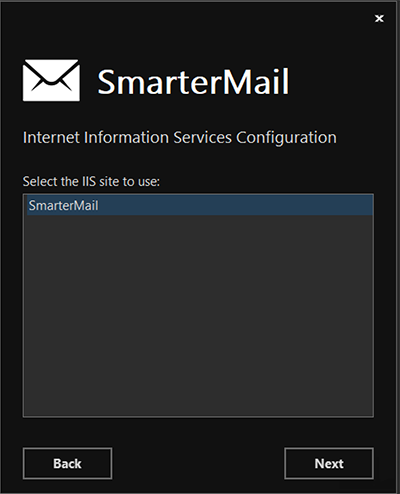
- Choose to use the same IIS site that was used previously. If IIS was not previously configured, create a new
site.
Note: An IIS site is required in order to access the SmarterMail web interface. An IIS site can be configured after installation; however, you will not be able to access the setup wizard or web interface in the meantime. If you choose to configure the site later, you can access the IIS Configuration Tool by navigating to its default location at C:\Program Files (x86)\SmarterTools\SmarterMail\IIS Tool.
- If you are running SmarterMail as an IIS site, IF NEEDED, change the .NET version of the Application Pool to .NET 4.0 and restart IIS.
Manually Installing SmarterMail
There may be times when you need to "manually" install SmarterMail. The most common scenario for this is when SmarterMail is installed on a server in an air-gapped network. That is, a server that is not connected to the internet. In this scenario, you will need to manually install SmarterMail and its prerequisites on the server.
During a standard installation, SmarterMail will download any prerequisites it needs, and install those alongside the standard application files. However, if no access to the internet is available, SmarterMail, along with its prerequisites, will need to be downloaded ahead of time and then moved to the server. Any prerequisites will need to be installed prior to running the SmarterMail installer.
- Ensure Internet Information Services (IIS) is activated on the server. SmarterMail requires a site to be set up in IIS, and while you don't need to pre-populate IIS with this site, having IIS running is essential .
- Download and Install .NET core components. This includes the .NET Core Hosting Bundle (at the time of this
writing it's the .NET Core Hosting Bundle for .NET 10), Application Request Routing module, and the URL
Rewrite Module 2.
Note: The links above are subject to change. Please check the links for the latest version of the .NET Core Hosting Bundle especially, and Application Request Routing and URL Rewrite modules.
- OPTIONAL: You may want to configure the Centralized Certificate Store if you intend on setting up custom SSL certificates for any SmarterMail sites you configure.
- Install SmarterMail. Go ahead and run the SmarterMail installer. If you encounter any modals that intiate downloads, go ahead and close them or cancel the download. This may cause the installation to stop briefly, but it will resume.
- After installation finishes, SmarterMail will attempt to open the SmarterMail website. If a browser opens but you see a spinner, simply be patient.
Troubleshooting
- If the SmarterMail site fails to load, make sure that there is a site in IIS set up. You should be asked to create this during the installation, but if you pre-configured a site in IIS and had the installation use that site, make sure that site is pointed to SmarterMail's MRS folder. By default this is located at C:\Program Files (x86)\SmarterTools\SmarterMail. This folder contains the web.config file you will need, as well as a few error pages in case SmarterMail cannot be reached. (Make sure to choose site bindings that are appropriate for your environment.)
- Ensure both the Application Request Routing and URL Rewrite modules are installed.
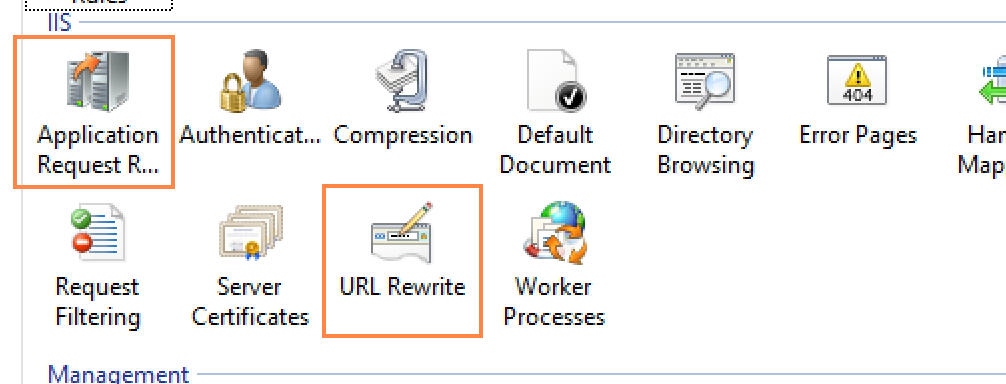
- Ensure ARR and the URL Rewrite modules are configured correctly. See below.
Configure the Application Request Routing Module
Here is how the ARR module should be configured. Double click the module name then, on the right side of the IIS interface, click on Server Proxy Settings.
- Enable Proxy should be enabled. (I.e., be checked.)
- HTTP version: should be set to "Pass through".
- Keep alive should be enabled (checked).
- Time-out (seconds): should be set to 1200.
- Reverse rewrite host in response to headers should be disabled (unchecked).
- Under the Customer Headers area:
- Preserve client IP in the following header: X-Forwarded-For
- Include TCP port from client IP: ON
- Forwarding proxy header value: should be blank.
- Under the Cache Setting area:
- Memory cache duration (seconds): 0
- Enable disk cache: Unchecked
- Enable request consolidation: Unchecked
- Query string support: Ignore query string
- Under the Buffer Setting area:
- Response buffer (KB): 4096
- Response buffer threshold (KB): 0
- Under the Proxy Chain area:
- Proxy server: blank
- Under the Proxy Type area:
- User URL Rewrite to inspect incoming requests: Unchecked
- Enable SSL offloading: Checked (it should be by default)
Configure the URL Rewrite Module
Here is how the URL Rewrite Module should be configured. Double click the module name then, on the right side of the IIS interface, click on Server Variables.
- Click on Add. A modal window will open. Add the following variables (you will need to click
Add for each variable):
- HTTP_X_FORWARDED_FOR
- HTTP_X_FORWARDED_HOST
- HTTP_X_FORWARDED_PREFIX
- HTTP_X_FORWARDED_PROTO
All other configurations will be pulled from the web.config file that is installed as part of SmarterMail.
Upgrade Process
To upgrade SmarterMail, do the following:
- First, back up your current SmarterMail installation or take a snapshot of your VM. This will give you something to fall back on should something happen during the upgrade.
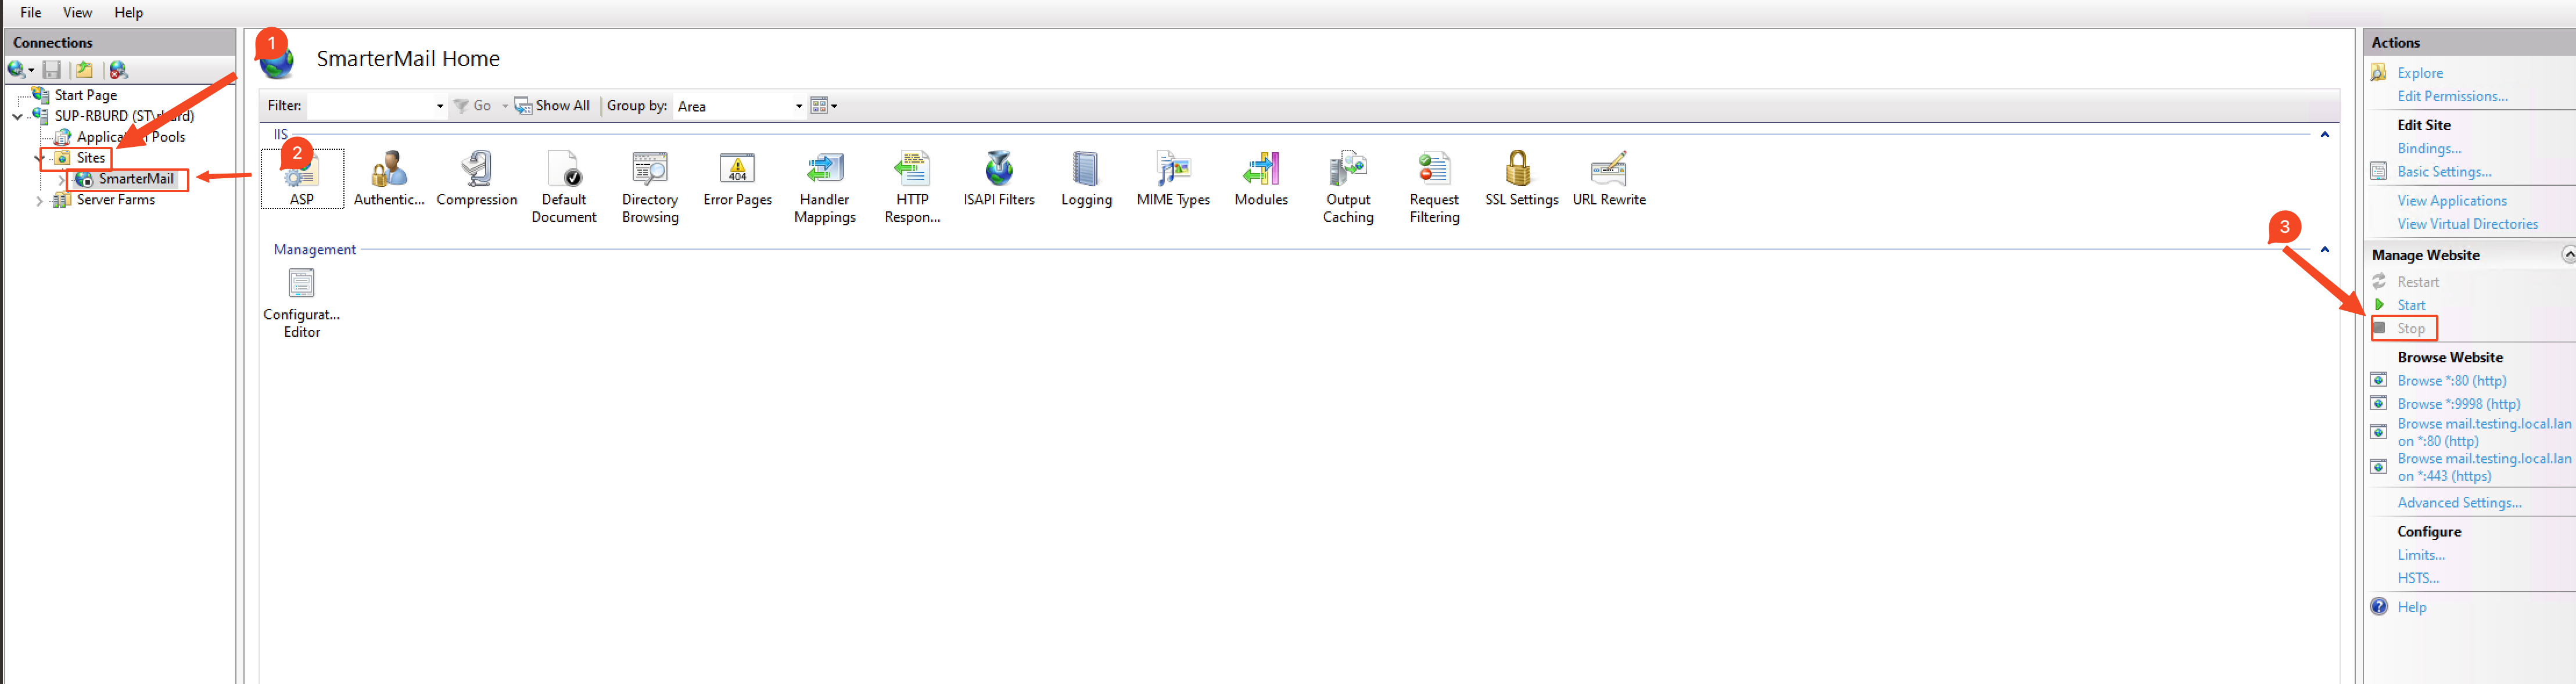
- Stop the SmarterMail website and associated Application Pool in IIS.
- Next, download the latest version of SmarterMail from our website.
- Uninstall the current version using Add or Remove Programs. This will only remove the SmarterMail program files — no data or system files are touched. This is an important step and should not be skipped, especially if you're upgrading from an older version. Newer versions may not require this step, but it doesn't hurt.
- Run the installer.
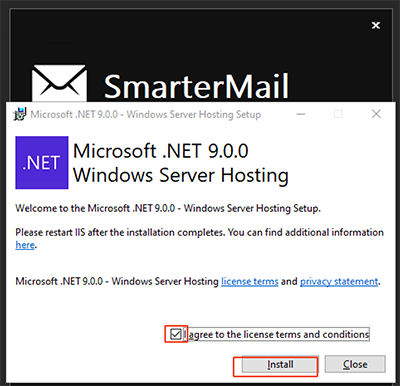
- Upgrading is essentially like installing for the first time. The difference is that most fields will simply carry over based on your existing installation. So you'll walk through the installation just as you did when first installing the product but things like your paths, etc. will already be filled in. The upgrade process even finds the existing SmarterMail site in IIS! .NET 9 is required for installation.
- Start the SmarterMail IIS Site - Verify everything is loading and working correctly.
- After the upgrade finishes, you're taken right to the SmarterMail login page where you can log in with your existing system administrator account.

Upgrading Failover Servers
For organizations running SmarterMail Enterprise in a failover configuration — that is, 2 SmarterMail front ends that share the domain, user and data via a network share or NAS — the upgrade process is a bit more complex. This is because the SmarterMail installer itself generally doesn't have access to the shared drive or NAS device. Therefore, it's not possible to make any modifications to the folders and/or data that is shared on those types of storage solutions. While an upgrade may not need to change any of those pieces, SmarterMail's upgrade process does still need access to them. Therefore, each server needs to be upgraded separately, with some files and folders moved temporarily during the upgrade.
Upgrading the Primary Server
For the purposes of this upgrade process, the "Primary Server" acts as the default SmarterMail server and manages the licensing of the server cluster whereas the other is considered the "Secondary Server" that remains connected to the cluster and is available as a "hot standby".
- Stop the SmarterMail Service on both the Primary and Secondary servers. The rest of these actions should be performed on the Primary Server.
- Uninstall the old version of SmarterMail via Add/Remove Programs.
- Install the new version of SmarterMail.
- Stop the SmarterMail Service again. (It will restart after the installation).
- Right-click on the SmarterMail Service and go to the Log On tab. Make sure the account being used has the proper permissions/credentials for accessing the shared directory.
- Start the SmarterMail Service. The old "failoverConfig.xml" on the shared drive should be converted to failover.json, which is saved in the Service\Settings directory.
- Verify that the domains loaded properly.
Upgrading the Secondary Server
Upgrading the Secondary Servers is a bit easier as you don't need to move files between the two servers.
- Stop the SmarterMail Service on both the Primary and Secondary servers. The rest of these actions should be performed on the Secondary Server.
- Uninstall the old version of SmarterMail via Add/Remove Programs.
- Install the new version of SmarterMail.
- Stop the SmarterMail Service again. (It will restart after the installation).
- Right-click on the SmarterMail Service and go to the Log On tab. Make sure the account being used has the proper permissions/credentials for accessing the shared directory.
- Start the SmarterMail Service. The old failoverConfig.xml on the shared drive should be converted to failover.json, which is saved in the Service\Settings directory.
- Stop the SmarterMail Service one more time.
- Edit the failover.json file to match the failover.json on the Primary Mail Server.
- Start the mailservice on BOTH the Primary and Secondary Servers.
- Verify that the domains loaded on the Secondary Server match the Primary Server.
After both servers have been upgraded, it's best to perform some tests to ensure that the failover acts as expected and that any backups being performed are working.
Steps for Upgrading Legacy Versions
When upgrading a legacy version of SmarterMail, such as SmarterMail 16.x or earlier, it's very important to understand the current version and how much different it will be than the version you're upgrading from. SmarterMail has not only improved greatly from legacy versions, but it's gone through a few interface changes along the way. This is especially noticeable if you're upgrading from particularly older versions of SmarterMail to a current Build.
In addition, we've previously recommended that customers upgrade in steps when coming from SmarterMail 14.x or earlier. However, this is no longer the case: the latest installers accommodate for all of the back end changes we've made since those versions, so it's no longer necessary to step up to SmarterMail 7.x, then SmarterMail 15.x, then on to the latest Build. In fact, it's NOT a good idea to upgrade in steps as you can carry forward any types of corruption or issues you may be having — even if you don't notice them. There can be back end file issues that you don't see, but that break an installation if you step through upgrades. Doing a standard upgrade to the latest Build should account for any of those issues and account for them in some way: either by fixing the issues or preventing those issues from corrupting any domains or users once the upgrade is complete.
That said, if you're at a point where you're upgrading from SmarterMail 15.x or earlier, we'd be happy to help you out: simply contact our Sales or Support Department and we can help test the upgrade for you, BEFORE you actually start through the process. Doing this will allow us to troubleshoot any issues you may encounter during the upgrade, and either fix them for you or help set your expectations of what you'll see once the upgrade completes.