Composing Email Messages
It's very easy to create new messages in SmarterMail as well as reply to existing messages or forward messages on to other individuals or groups. Below you'll find a brief walkthrough of each scenario.
Jump To:
- Composing the Message
- AI Assistance
- Sending the Message
- Replying to Email Messages
- Forwarding Email Messages
- Forwarding Multiple Messages
Setting To, From, Subject, etc.
Creating a new message will pop-out the compose window. SmarterMail uses a pop-out window because it allows you to reference other areas of SmarterMail or easily navigate to other browser tabs if you're using other websites for information to include in your new message.
The following fields appear in the new message window:
- From - If you have more than one account set up, or one or more domain aliases, you have the ability to select the address from which the message will be sent. Otherwise, the message is sent from the one user you have set up. If multiple users are available, the From: line will have a down arrow. Simply click the arrow and select the address from the dropdown.
- Signature - If you have more than one signature set up, or if the domain administrator has set up a default signature for you, you have the ability to select the signature used for the message.
- To - Type the email address for each primary recipient you want to receive your email. Multiple addresses can be used, simply separate each with a comma or semicolon. When entering addresses into the To, Cc, and Bcc fields, SmarterMail will auto-complete addresses by referencing your contacts list, mailing lists, your auto-complete list, aliases or the Global Address List.
- Cc - Carbon Copy (Cc) recipients are those who should be included as part of the conversation, but are not necessarily primary recipients.
- Bcc - Blind Carbon Copy (Bcc) recipients are hidden from those people listed in the To and Cc fields. In addition, in a Reply All scenario, Bcc users do NOT receive a copy of the reply. For this reason, it is common practice to use the Bcc field when addressing a very long list of recipients or a list of recipients that should not (necessarily) know each other.
- Subject - Type a descriptive subject or title of the email.
Selecting Contacts
In addition to simply typing in the address you want to send to, it's possible to select contacts to populate the To, Cc, and Bcc fields. To do this, simply click the filed name. (I.e., To:, Cc, and/or Bcc.) This option opens a modal window and, from here, you can select the contacts based on a folder (i.e., Contacts, Global Address List, shared Contacts, etc.) or even display contacts based on a category. When a choice of folder or category is made, contacts associated to the selection are listed in the modal. One or more can then be selected, saved, and then added to the To, Cc, or Bcc field(s) as needed.
Composing the Message
Below the Subject line is a complete HTML editor that you can use to write and format your message. A number of formatting options are available, from selecting a font color to inserting multimedia elements to a message.
While it's possible to format a message using the buttons/tools available with the HTML editor, it's also possible to create a customized, HTML-rich message using an outside product or service, and then paste that code into the compose window of SmarterMail. Ideally, you'd switch SmarterMail's editor from "design view" — where you're using the toolbar to format your message — to "code view" with the "<>" button. Using code view, you create or edit the actual HTML tags that are used for formatting the message. When creating a message using an outside editor, pasting the code that's generated into the code view of the compose window ensures your original formatting is used for the message. You can then swap back to design view and see how the message renders. Once the message is created, it's ready to be sent.
Using AI Assistance
With the new AI feature, you can easily adjust your message to lengthen or shorten it, proofread the entire message or just a section, translate the message, or even change the tone. For more information, see the AI Assistance page.
Sending the Message
Prior to sending the message, it's possible to add attachments, add "actions" for marking the message is some way, and more. The following actions are available for a new message:
- Send Options - SmarterMail offers two different ways to send an email message: one that includes a built-in delay that can be configured in Account Settings, and another that sends the message immediately.
- Send - This sends the message to its intended recipients using the configured delay.
- Send Now - This sends the message to its intended recipients immediately, without using any configured delay.
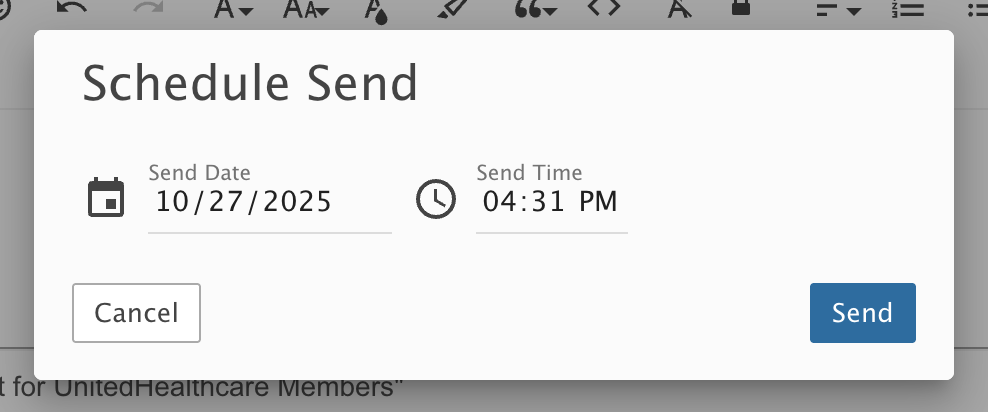
- Schedule Send - This allows the user to set a day and time to send the message. At the set day and time, the message is sent immediately.
- Cancel - Cancels your message. However, SmarterMail has an auto-save setting, so it's possible that a draft of your message will be saved automatically. If this happens, you'll see a number appear next to your Drafts folder. Clicking Cancel will display a window asking whether you want to save a draft of the message.
- Save Draft - Saves the message in its current state to the Drafts folder without actually sending it. This is useful if you need to continue writing the message at a later time.
- Attach (Paperclip) - Allows you to attach one or more files to the message. See below for more information.
- Actions (⋮)
- Message Priority - Set to High, Normal or Low. Specifies the importance of the message. By default, messages have a normal level of priority.
- Request Read Receipt - Sends an email confirmation back to the sender when the recipient opens the message.
- Request Delivery Receipt - Sends an email confirmation back to the sender when the message is successfully delivered to the recipient.
- Flag - Marks the message for follow-up. For more information, see Marking Email for Follow-ups .
- Link File - Uses SmarterMail's File Storage feature to insert a link to a file saved on the mail server or to a file located in a connected file storage account, such as Dropbox or OneDrive. Either way, the links can be sent to recipients who can then download the linked file(s).
Delay Send VS Scheduled Send
Delay Send holds all outbound messages for up to a minute (depending on the user's settings) before adding them to the spool, giving the sender a window to recall the message. Messages sent using delay send will appear in the sender's Sent Items folder and will have an indicator on them until they reach the send time.
Scheduled Send is an option that can be selected when sending a message, allowing the sender to select a specific date and time that the message should be sent. Because this will generally result in the message being held for a longer period of time before the message is added to the spool, they are placed in a new default folder labelled Scheduled.
Configuring Delay Send in Seconds for a User
As mentioned, SmarterMail offers webmail users the ability to use a built-in delay for sending an email message. What this does is place the outgoing message in the Spool, but will delay processing that message based on how the user has this delay configured. Users can manage their delay by going to their Account Settings and navigating to the Email card. Here, they'll see the setting and a dropdown. The delay can occur in the following increments (in seconds): 0, 5, 15, 30, 60. (This is set to 5 seconds by default.) In order to avoid having to use "Send Immediately" for every message that's sent, if a user never wants a delay implemented, they can set this to 0 and Send and Send Immediately will act exactly the same.
When a delay is implemented, a user can STOP the sending of a message by clicking on the Undo Sent Message button that appears in the Statistics bar of the webmail interface that appears at the bottom of their list of email messages. Clicking that button will put the new email immediately into their Drafts folder. Here, the user can then edit, change, or otherwise delete the message before it's actually sent.

Attaching Files
In addition to using the Attach button when composing a message, you have the ability to drag-and-drop files to be attached to your message. When files are attached to an outgoing message, a file manager will display at the bottom of the new message window. The file manager will display the name, size, and upload status of the file. Attachments must reach an upload status of 100% before the item is actually attached to the message.
To display an image within your message body, use the Insert Image button from the toolbar editor.
Replying to Email Messages
SmarterMail gives users two options for replying to a message:
- Reply - Addresses a response to the sender only.
- Reply All - Addresses a response to the sender and everyone else who received the message. This includes all email addresses listed in the To and Cc fields, except your own email address.
When replying to a message, SmarterMail automatically fills in the address fields with the email addresses of the recipients from the original message, the subject field with the subject from the original message preceded by "Re" (which means "regarding" or "in regards to"), and the text box with the text from the original message. It is possible to edit any of these pre-filled fields, however, as needed. All other message options are the same as when composing a new message.
Forwarding Email Messages
You may also want to simply forward a message to a third-party or to someone not already copied on the original message. This is very easy to do:
- Forward - Allows you to send the message to a third party, or to an address that is not in the To or Cc fields.
Messages can be forwarded individually or in bulk. When forwarding multiple messages, the EML file of the email will be attached to a new compose window. SmarterMail automatically fills in the subject field with the subject from the original message preceded by "Fwd" (which means "Forward"), and the text box with the text from the original message. It is possible to edit any of these pre-filled fields, however, as needed. All other message options are the same as when composing a new message.
In addition, SmarterMail has an auto-forward option, which can be found in a user's Account Settings, that will forward a copy of all messages sent to a user's Inbox (as well as messages routed to other email folders via content filters or plus addressing).
Forwarding Multiple Messages
On occasion, users may want to forward multiple messages to someone. Instead of forwarding each message individually, SmarterMail allows users to forward multiple messages at once and includes them as attachments to a single message.
Follow these steps to forward multiple emails at once:
- Log into SmarterMail as a user.
- Click the Email icon.
- In the navigation pane, click the folder containing the messages you wish to forward. The messages in the folder will load in the content pane.
- Select the desired messages. This can be done by selecting them individually, using the Sort button to look for messages with attachments, etc., it can be done by doing a search and then selecting all of the search results, etc.
- Click the arrow next to the Reply button.
- Select Forward in the drop-down. (This should be the only Reply option available to you.) This will open a new message window that you will use to compose a message to the desired recipients. The messages that you wanted to forward will be attached as .eml files to the new message.
- Compose the message and click Send.