Hub and Node Set Up and Configuration
Once you have your hubs and nodes installed, it's time to get them set up and configured. Actually, hubs simply need to be set up, but nodes need to be set up, attached to the hub, and then configured. Then, after a node is configured, there's some post deployment steps that are required to ensure domains are set up where they're supposed to be.
Hub Set Up
Once installation completes, you’ll want to navigate to the hub using a web browser. As you probably don’t have a hostname set up just yet, if your OS uses a GUI, the default location is http://localhost:17017. If you do have a hostname set up and it’s accessible over port 80, you can use that. This will load the Welcome to SmarterMail setup wizard for your hub:
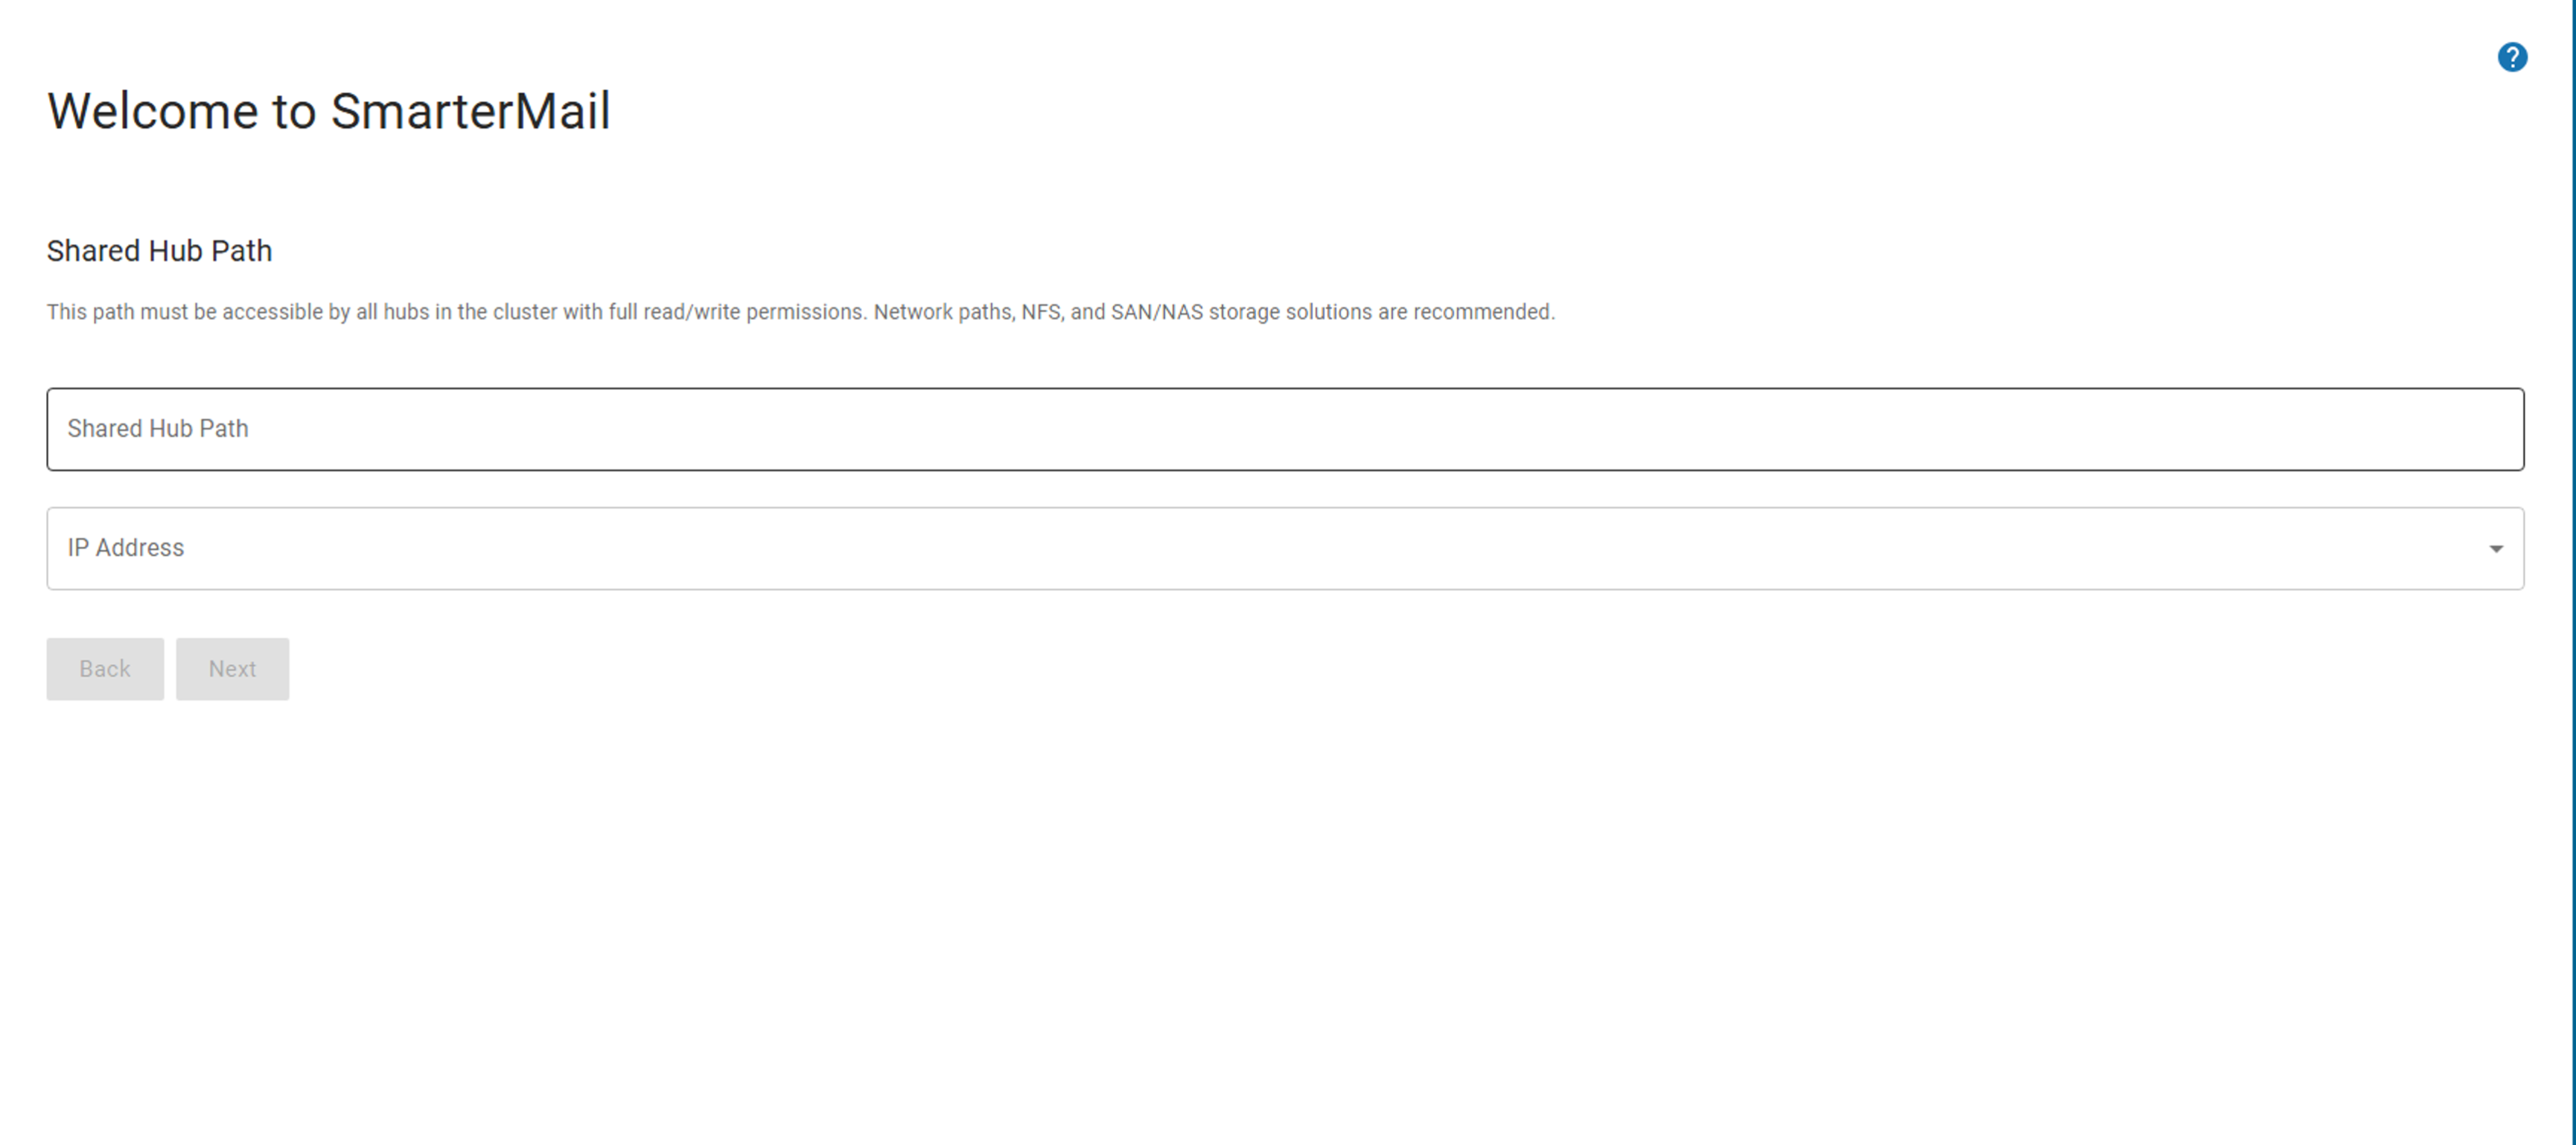
Here, you'll set up a few pieces of information to get you started:
- Shared Hub Path - If you remember back to the SmarterMail HA Installation Instructions, you set up a shared directory, and within that share you created various folders: one that will be used for your hubs, and then one for each node you planned. This is where you put the path to the share you set up for your hub. For example, "/data/hub/". Just remember: the Shared Hub Path on each additional hub you add to your cluster MUST match!
- IP Address - This is the primary IP address used for the hub interface.
Click the Next button, and you’ll move on to the next step: licensing information.
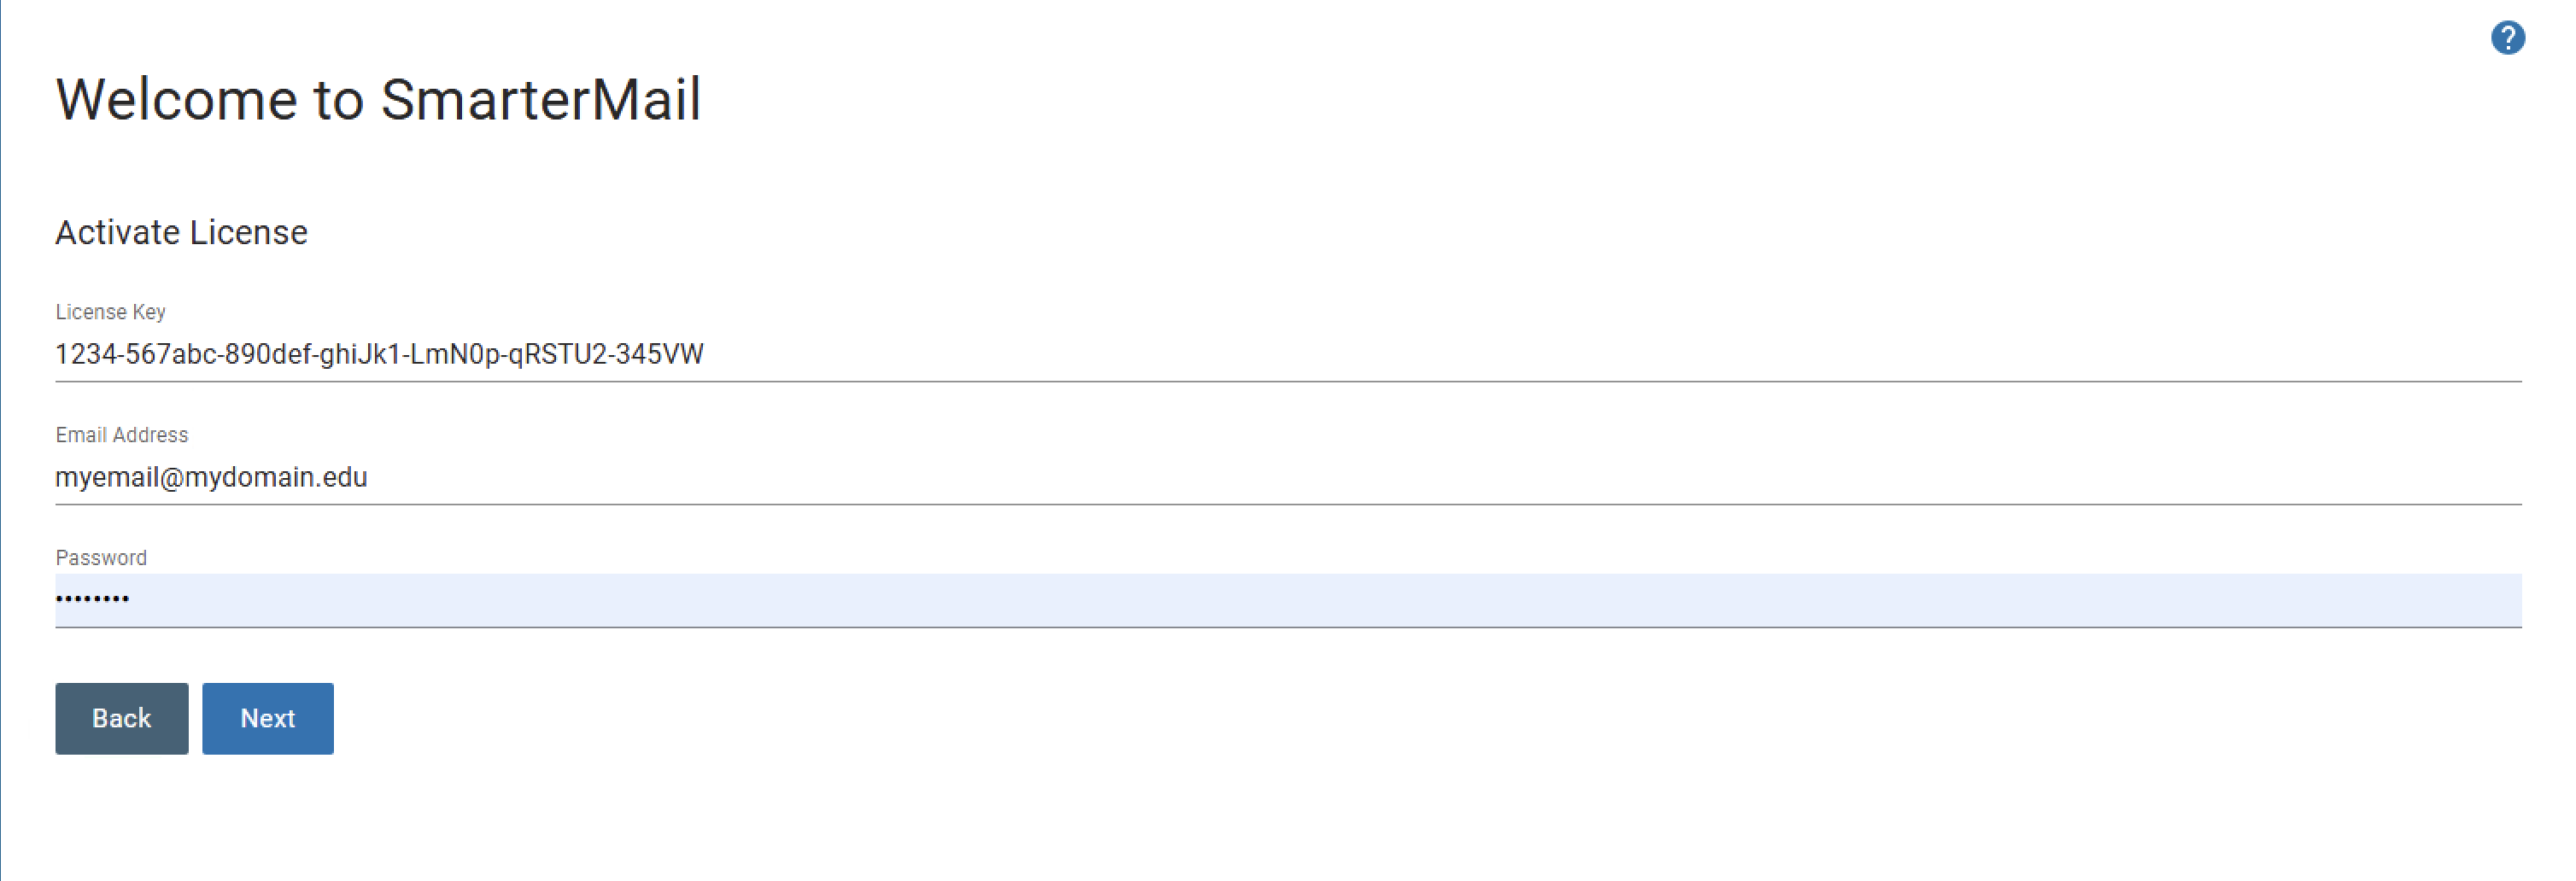
- License Key - This is the license key associated with your HA installation. You can find it by logging in to your SmarterTools account.
- Email Address - The email address that's associated to the SmarterTools account that owns the license key.
- Password - The password that's associated to that SmarterTools account.
Next, you will set up the cluster administrator account. This is similar to a system administrator login that's created for SmarterMail Professional and Enterprise installations, but it's for the management of the entire SmarterMail HA cluster.
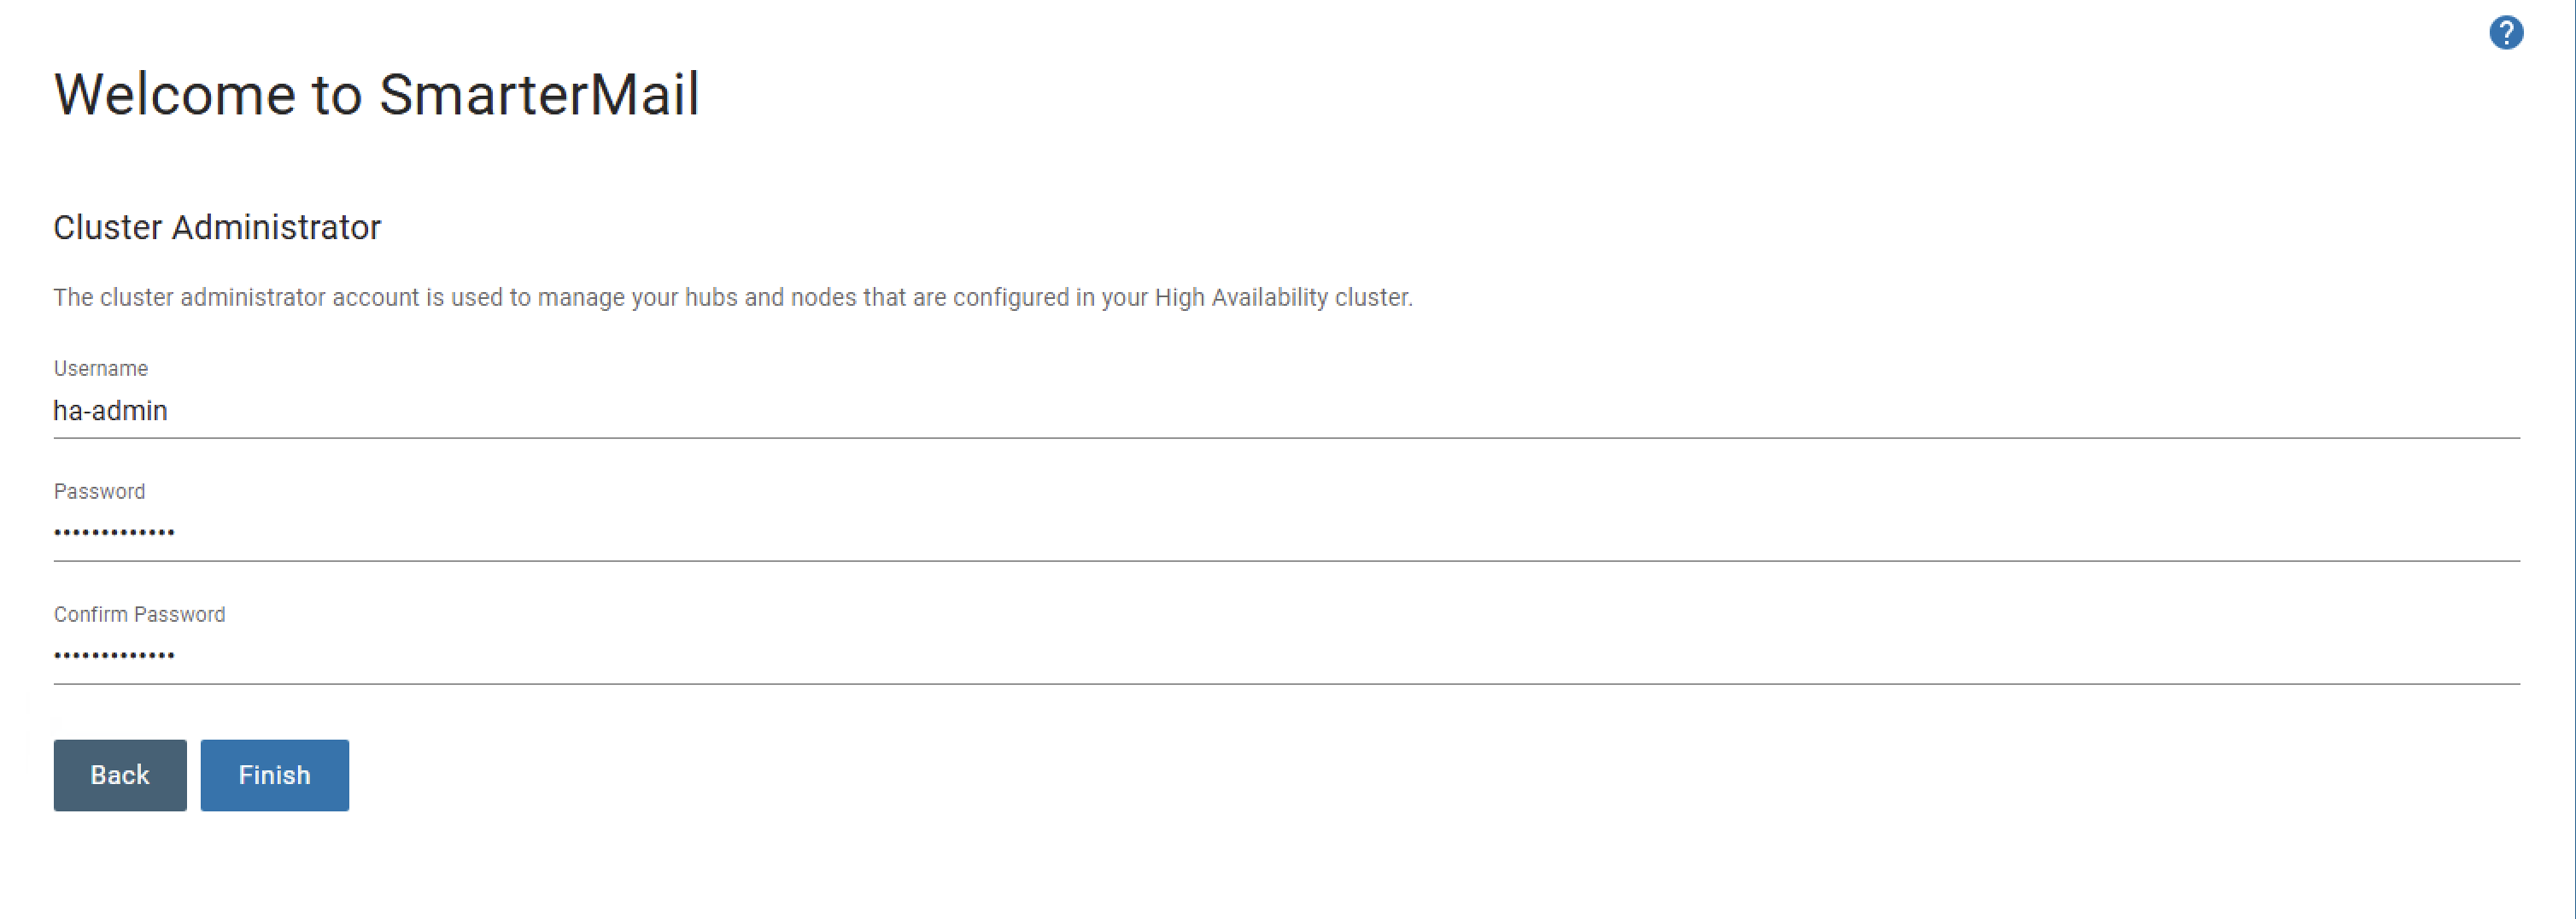
- Username - The username that will be used to log in to the SmarterMail HA cluster.
- Password / Confirm Password - The password that will be associated to the cluster administrator account.
Once you click the Finish button, you'll be redirected to the hub login page. Use the username and password you just created and you'll be logged in to your cluster.
Node Configuration
Prior to setting up your node (and any additional node you add to your cluster), you need to configure it in your hub. What this does is essentially tie the node you'll be setting up to your hub. Therefore, in order to configure a node you'll need to log in to the a hub. Once you've done this, you can begin node configuration.
- Go to Manage and click on the Nodes tab. When you're just getting started, this tab will be blank. Moving forward, ever time a node is added and associated to the hub you're logged in to, it will appear on this tab.
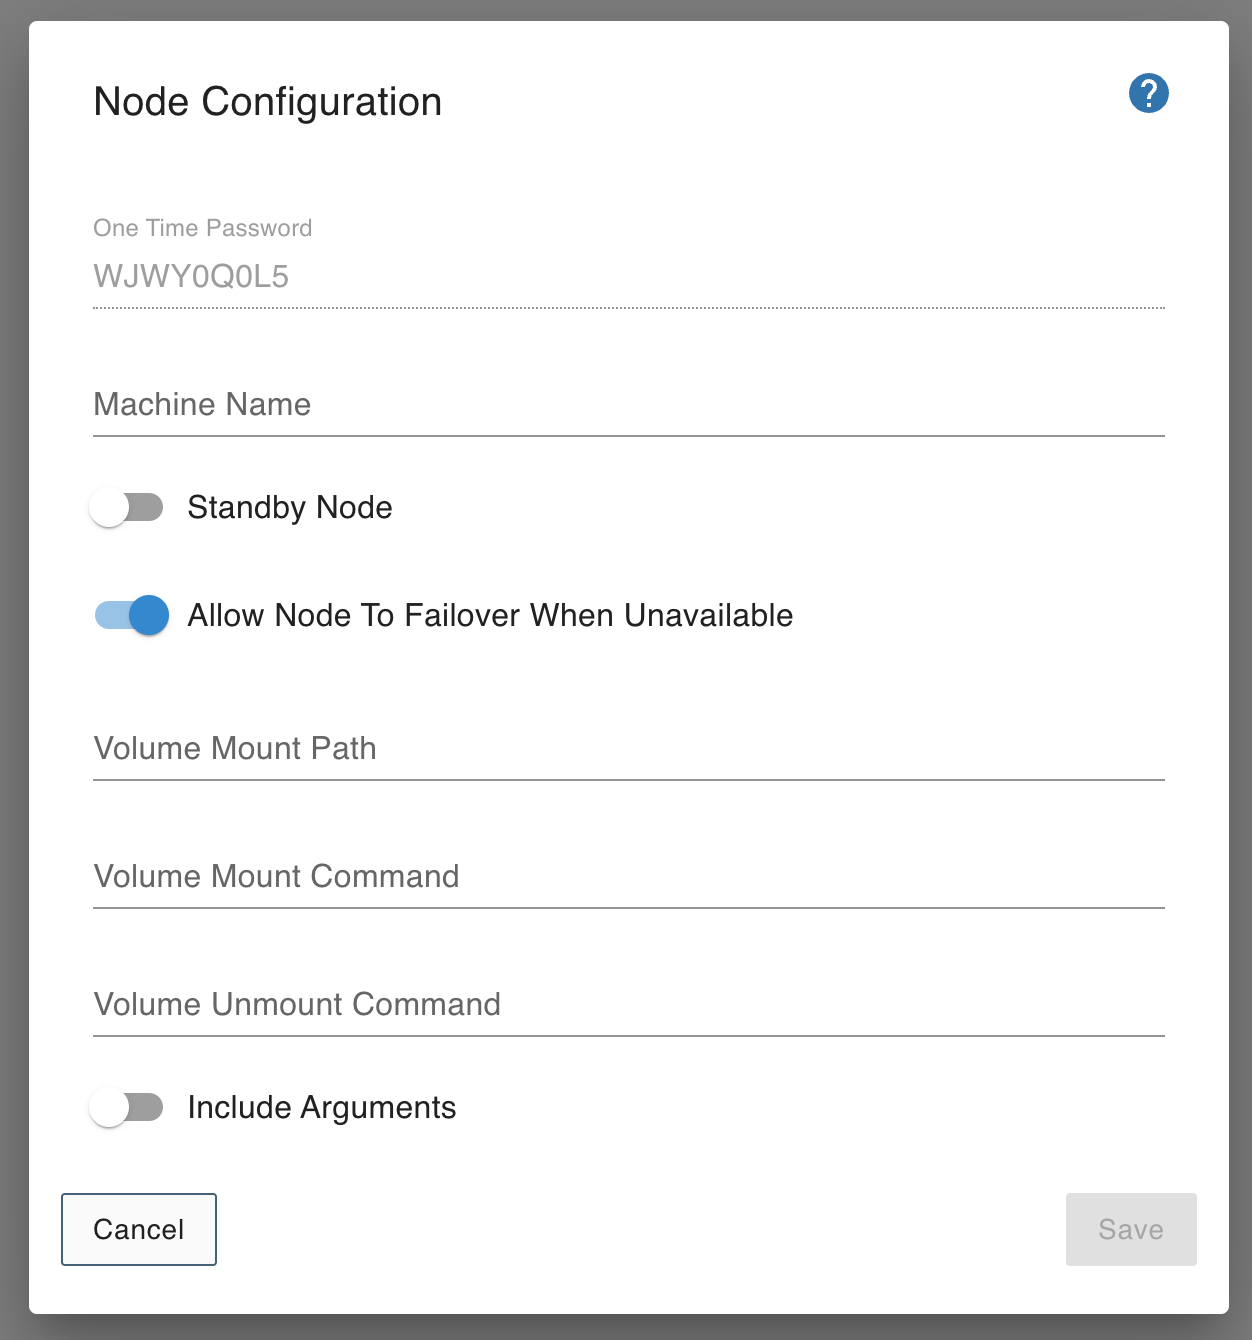
- To add a node, click the New button. The following modal will appear:
- On this modal you'll need to set up a few pieces of information in order to get your node added to the hub. This includes:
- One Time Password - This is generated by the hub and will be used when setting up the node to tie the node to the hub. It is EXTREMELY important that you copy or write this password down as it will be used to set up your node.
- Machine Name - The friendly name for your node. (E.g., smartermail-node1.) This is used to identify each node when it connects to the cluster.
- Standby Node - Toggle this if you want the node you're setting up to be a standby (non-active) node.
- Allow Node To Failover When Unavailable - Toggle this if you want the node set up so that it will automatically failover to any node configured as a standby.
- Volume Mount Path - The path to the share created for this particluar node. For example: /data/node1/
- Volume Mount Command - The Linux or Windows command used to mount the share referenced in Volume Mount Path.
- Volume Unmount Command - The Linux or Windows command used to unmount this same share.
- Include Arguments - Toggle this to allow arguments in the Volume Mount or Unmount Commands. For example, with this toggled you can have your mount or unmount commands execute a script that performs a specific action. That means your mount command may look something like this:
This executes the mount.sh script, which performs the mounting of the share./users/smartermail/SmarterMailHA-C/mount-1/mount.sh
- Click the Save button to save your configuration, after you make sure you have the One Time Password!
Once the above is done, it's time to log in to the node and get it set up.
Node Set Up
Now that the node is configured, it needs to be set up. Setting up a node is really not much different than setting up a SmarterMail Enterprise installation. In fact, the "Welcome to SmarterMail" page that's displayed is exactly the same for an Enterprise installation as it is for SmarterMail HA. The difference is that there are two options when configuring SmarterMail:
- SmarterMail Professional or Enterprise - Allows you to configure SmarterMail as a single mail server.
- SmarterMail High Availability - Allows you to configure a SmarterMail HA Node.
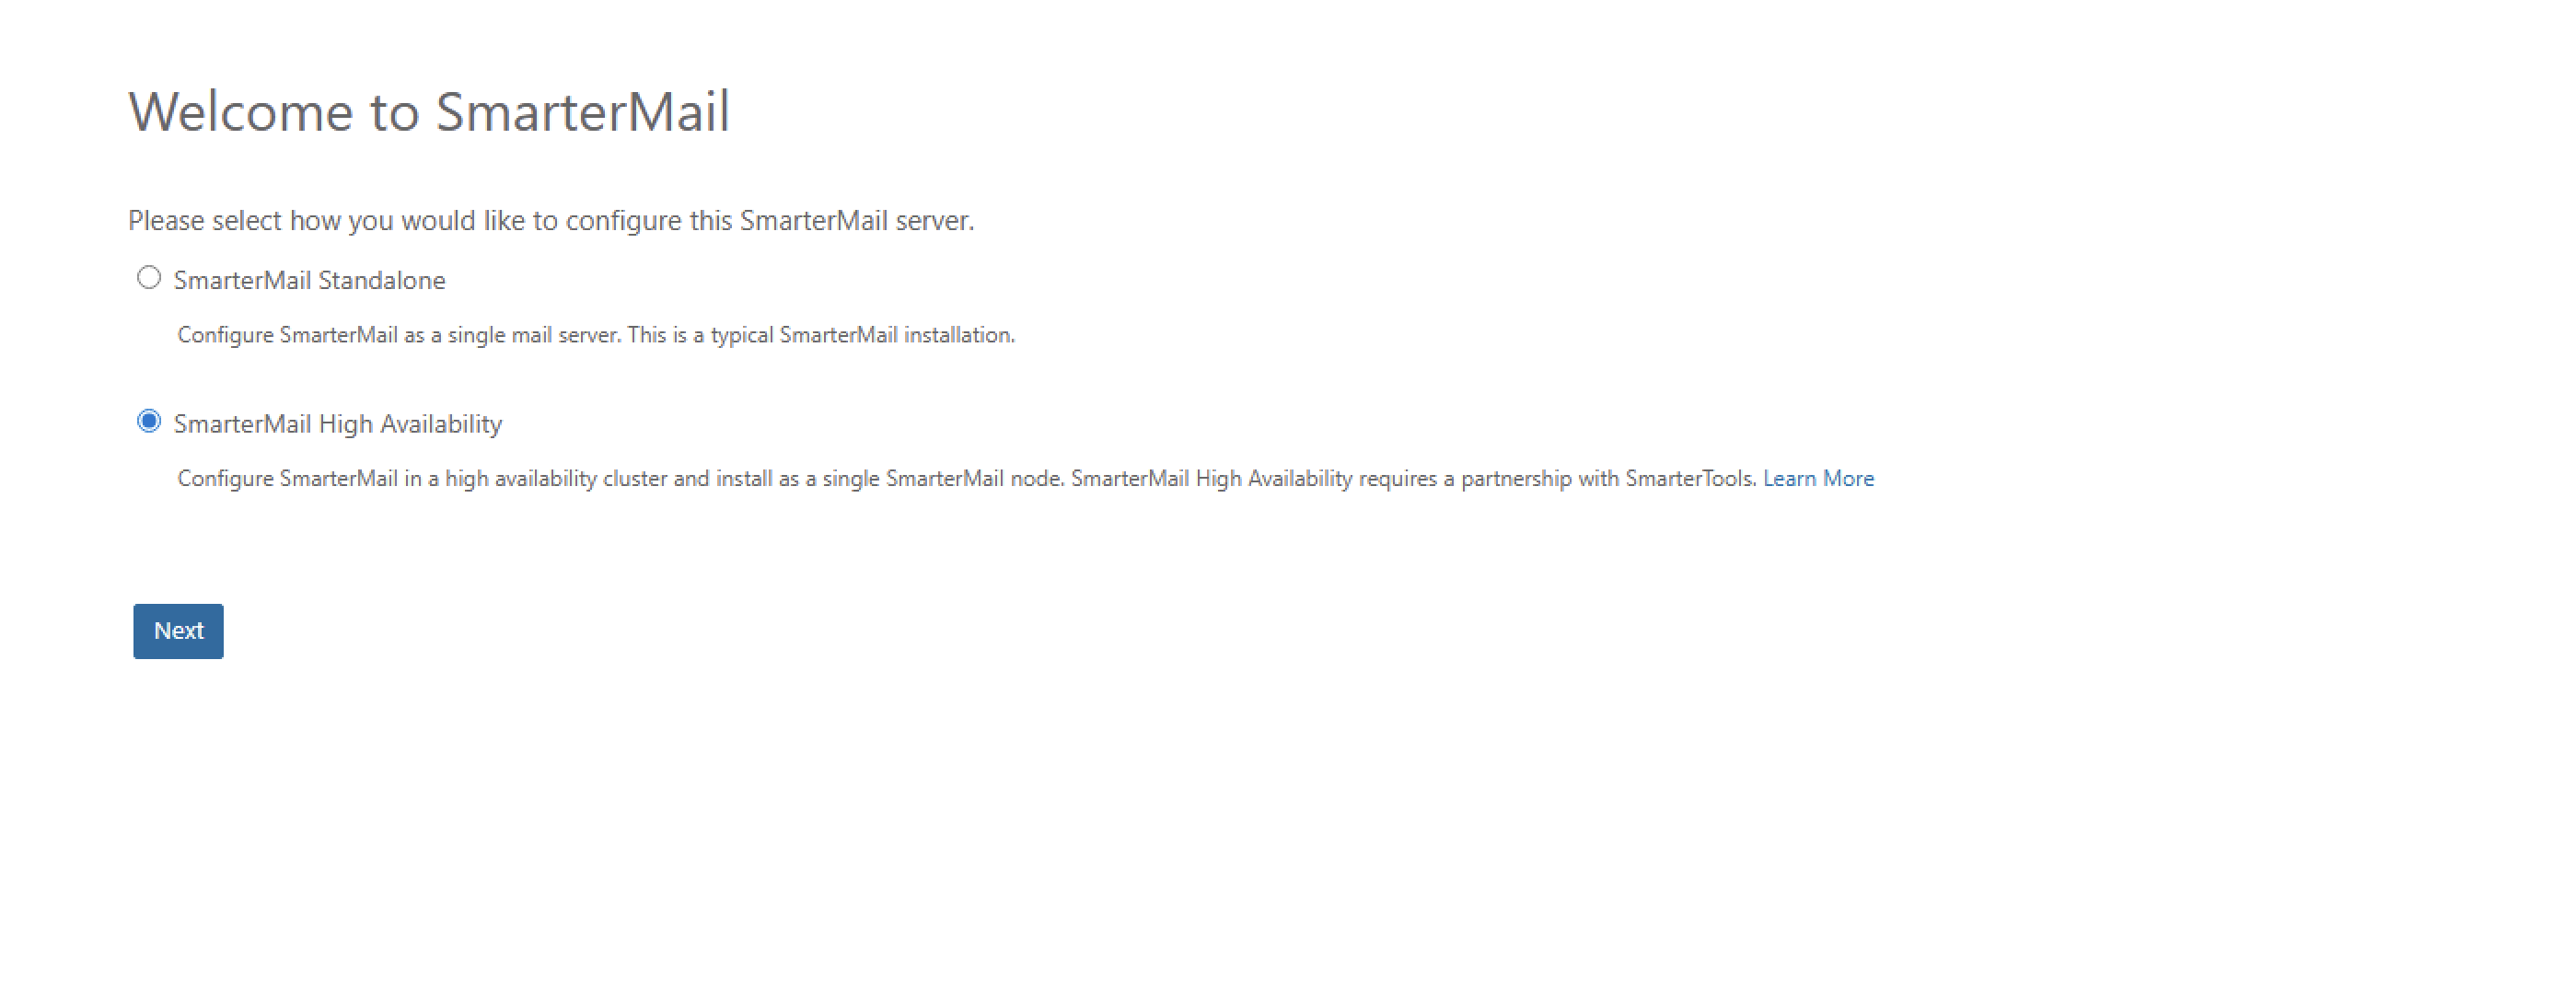
For our purposes, you'll want to select "SmarterMail High Availability". Next, you'll be asked to connect the node to your hub:
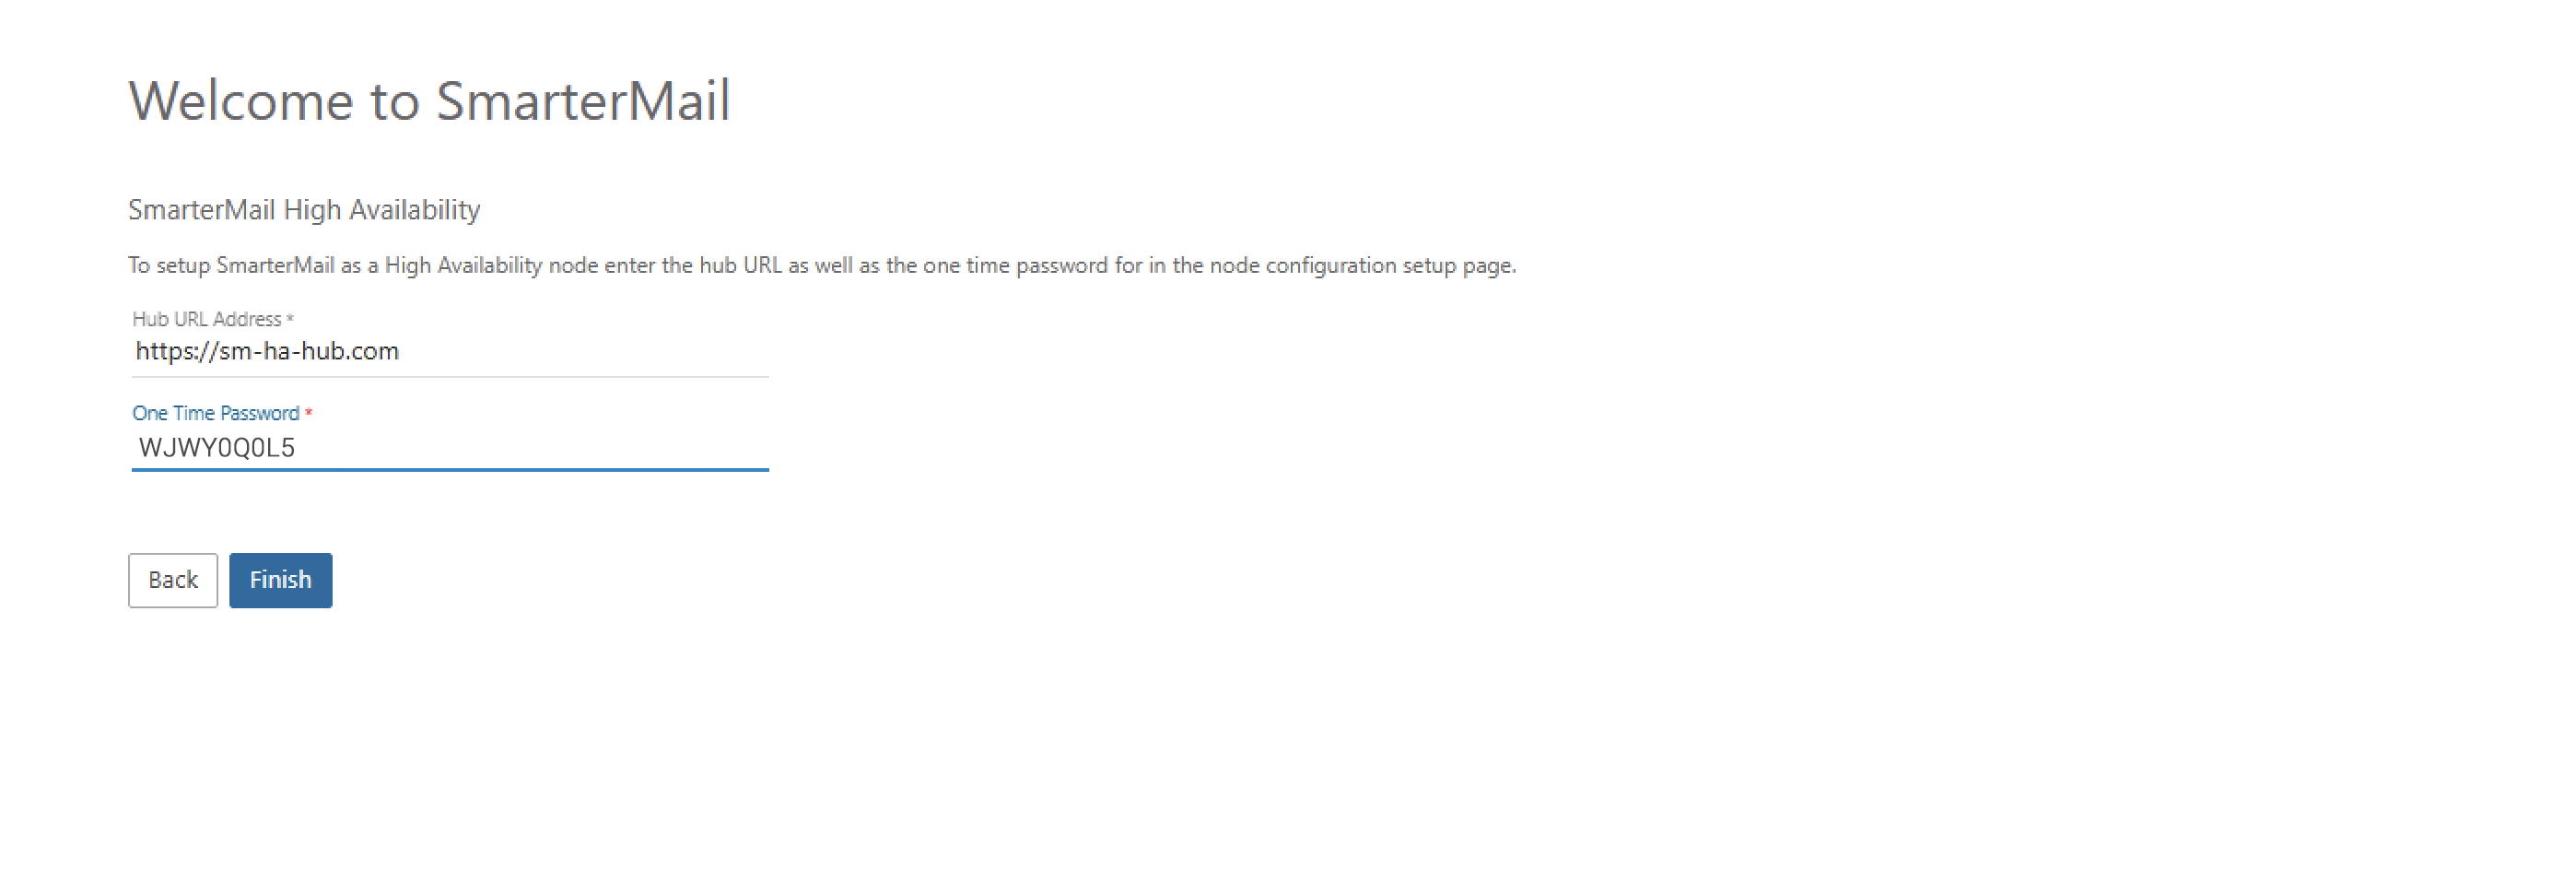
- Hub Address - The location of the hub you’ve installed and configured. Use the hostname address of the hub if at all possible.
- One Time Password – The One Time Password you diligently saved when configuring the node in your hub.
Repeat these steps for each node in your cluster. Once you've added all nodes (or just added your first), it's time to do some post-deployment set up for domains that will be added to the node.
Post-Deployment Domain Setup
Lastly, you will need to make a couple of adjustments to the node to finalize the SmarterMail HA setup for the domains that are added to the node.
- Log back in to your hub.
- From the Manage area, click on the Nodes tab.
- Right click on your node, and select Manage Node. This logs you in as the system administrator for that node. You’ll see that this is really no different than logging in as a system administrator to any SmarterMail installation.
- Select Manage from the top menu, and click on Domain Defaults from the left tree menu.
- On Domain Defaults, you need to set the Root Mail Path to the share path you created for that node. Using our example, that would be “/data/node1/domains/”. (You will want to add “domains” so that a domains folder is created within the share. Then SmarterMail will create folders inside that “domains” folder for each domain that’s added.)
- Click the Save button.
- Next, click on Settings from the top menu, and then General in the left tree.
- You will need to add paths to your share for the node to Spool Path, Log Files, and Quarantine Path on the Paths card. These paths would look like this:
- Spool Path - /data/node1/spool/
- Log Files - /data/node1/logs/
- Quarantine Path - /data/node1/spool/quarantine
- Click the Save button.
- Finally, click on Administrators in the left tree menu. (NOTE: If you created a Primary Administrator during Node Configuration, you can skip this unless you want to add a second node administrator.)
- Here, you can create a local node administrator, if one wasn’t created during Node Configuration, or you can add a second administrator. Regardless, whatever username you create should NOT match the cluster administrator’s username.
- Once this is completed, this node’s configuration is complete. You can then repeat the above for any other nodes you’ve set up.