Adding Hubs and Nodes
Since SmarterMail HA is a clustering environment, you'll want to add additional hubs and/or nodes to your cluster for redundancy and fault tolerance. Adding a hub is largely a matter of installing it and pointing it at the same shared storage your existing hubs use; the cluster handles the rest. Adding a node is no different than setting up your first one: install SmarterMail for HA on a new server, register the node in a hub, then run the node's own setup wizard.
Below, we'll walk through adding each.
Adding Hubs
Once you have a single hub installed and configured, you can add a second, third, and more. There's no file editing involved, and you don't need to take your existing hubs offline to do it.
- Install the hub on its new server, following the hub installation steps for your platform in SmarterMail HA Linux Installation or SmarterMail HA Windows Installation.
- Browse to the new hub and step through the first page of the setup wizard, entering the Shared Hub Path your existing hubs already use, along with the new hub's own IP Address Or Hostname.
- Click Next. That's the whole procedure.
Because the shared path already contains an ha-settings.json file, the new hub recognizes that it's joining an existing cluster rather than starting a new one. It reads the cluster's identity, license and cluster administrator accounts out of that file and skips the wizard steps that cover them, which usually means you go straight from step 1 to the login page. Behind the scenes the hub registers itself with the cluster, restarts its web application against the shared path, has a member certificate issued by the cluster's certificate authority, and connects to the cluster leader. The leader is the member that writes the new hub into the shared ha-settings.json, and it then pushes the updated hub list out to every node in the cluster.
A few things need to be true for the new hub to complete its join:
- The shared path has to be writable. The wizard writes and deletes a test file before it will accept the path, and it warns you if the path doesn't look like network storage. Every hub needs full read/write access to it.
- The hub's machine name has to be unique in the cluster. A hub is identified by its machine name, which is also what goes into its certificate, so two hubs can't share one.
- DNS has to resolve the hub's cluster name. The other hubs will reach the new hub at its machine name combined with the cluster's environment and DNS suffix, so that name has to resolve to it. See How Hubs Address One Another below.
- The address you enter has to belong to the new hub. The wizard accepts either an IP address or a hostname, but it validates the value against the machine's own network interfaces. If a hostname doesn't resolve to one of them, setup stops with "Hostname must map to local system"; a bad IP address stops with "Invalid IP."
- Cluster ports have to be open between hubs. Hub-to-hub traffic uses the operational mTLS port, 17993. Nodes enroll on the join service port, 17003, which every hub listens on.
Now, when logging in to the hub, you'll see both listed on the Hubs tab.
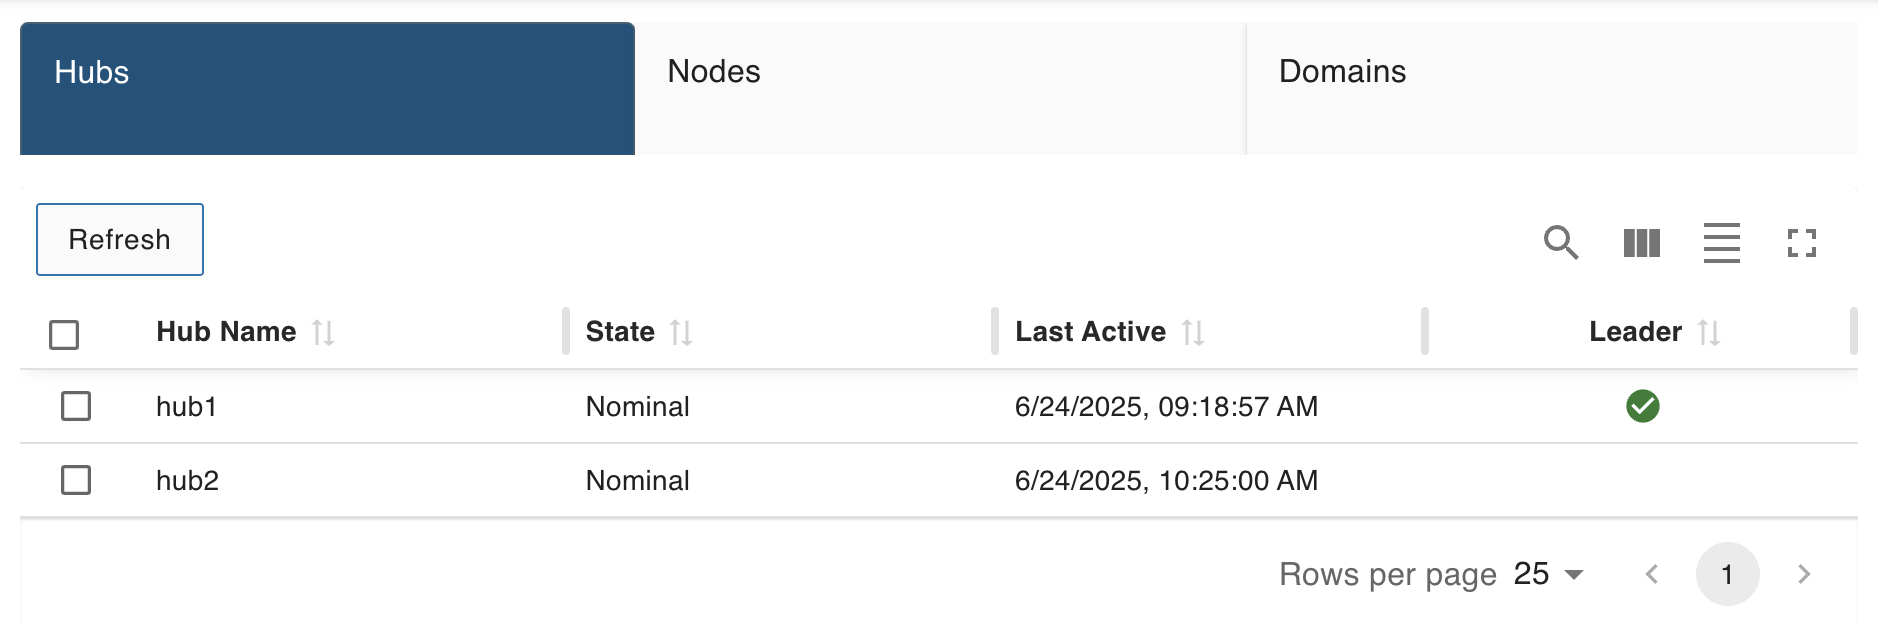
The Hubs tab lists each hub's Machine Name, Hub State, Status, Leader and Last Active. The Leader column marks the hub currently elected as the cluster leader. Leadership is decided by the cluster itself and moves automatically when the current leader goes away, so there's nothing to configure and no reason to prefer one hub over another.
How Hubs Address One Another
This is worth understanding, because it accounts for most of the trouble people run into when adding a hub. All hub-to-hub traffic runs over mutual TLS, and every cluster member's certificate carries a DNS SAN built from the cluster identity values you set when the first hub was configured. A hub therefore dials a peer by the name in that certificate, not by an address recorded in a settings file.
- The dialed address is https://machinename.environment.dnssuffix:17993, with the environment segment omitted when Cluster Environment was left blank. Using a cluster whose DNS suffix is cluster.acme.example.com and no environment, a hub named hub2 is reached at https://hub2.cluster.acme.example.com:17993.
- Peers are not dialed by IP address. Connecting to a bare IP wouldn't match the peer certificate's DNS SAN, and certificate validation would refuse the connection. That's why the cluster's DNS suffix has to resolve for every member, and it's the single most common reason a new hub installs cleanly but never appears healthy.
- The endpoint recorded for each hub in ha-settings.json is a record, not a route. It reflects where a hub was last reached from and is maintained by the cluster leader. It isn't the address peers connect to, and it isn't something to hand-tune.
- The address you type during setup is only about the hub itself. It can be an IPv4 address, an IPv6 address or a hostname, and its job is to tell the cluster where this hub answers. It has to map to a local interface on that machine.
Adding Nodes
Since SmarterMail HA is a clustering environment, you'll want to add additional nodes to your cluster for redundancy and fault tolerance. Basically, adding more nodes is no different than setting one up initially: install SmarterMail for HA on a new server, register the node in a hub, then walk through the node's setup wizard. Hub and Node Set Up and Configuration covers every field in detail. The short version:
- Install SmarterMail for HA on the new server. Make a note of its machine name and of the IP address it will contact the hub from.
- Log in to a hub as the cluster administrator, go to Manage, click the Nodes tab, and click New. Enter the node's IP Address and Machine Name, along with the Volume Mount Path and mount and unmount scripts for the share you created for this node. Click Save.
- Browse to the new node, choose SmarterMail High Availability, and enter the Hub Hostname along with the same Cluster Trust Domain, Cluster Environment and Cluster DNS Suffix your hub was configured with.
- Create the node's primary administrator account. The node restarts and joins the cluster.
Two details from the configuration topic are worth repeating here, because they're what usually trips people up on the second and third node:
- Machine Name must be the node's real machine name, and it has to be unique across every node and standby node already configured in the cluster. It's the name the node presents when it enrolls, and a hub won't admit a name it doesn't recognize.
- IP Address is consumed by a successful join. Once the node enrolls, the hub clears the value it was registered with, so the registration can't be reused from another machine. If you rebuild a node, edit its configuration and enter the IP address again before running setup on it.
There's no post-deployment path setup to run on a new node any more. The node's setup wizard derives the root mail path, spool, logs, quarantine and the rest from the Volume Mount Path you registered for it in the hub, so the node comes out of setup ready for domains to be added.
Adding Standby Nodes
A standby node is added exactly the same way, with Standby Node toggled on in the node's configuration. A standby node holds no volume of its own, so the mount fields disappear when you enable the toggle and there's nothing to fill in beyond the IP Address and Machine Name. On the node itself, setup finishes as soon as it joins: you'll see a message confirming the standby node successfully joined the cluster, and the node restarts into standby to wait for the hub to hand it the volume of a node that has failed over. There's no primary administrator step and nothing further to configure.
Note that the Standby Node toggle can only be set when the node configuration is first created, so decide up front whether a given node is active or standby.
Removing a Hub or Node
Both are done from the Manage area of a hub, not by editing files.
- Hubs tab - Right click a hub and select Delete. The hub has to be offline first; the cluster refuses to delete a hub that's still connected. Suspend Hub takes an active hub out of rotation without removing it from the cluster, and Restore brings a suspended hub back.
- Nodes tab - Right click a node and select Delete. This is available only while the node isn't active, so stop or fail over the node first.